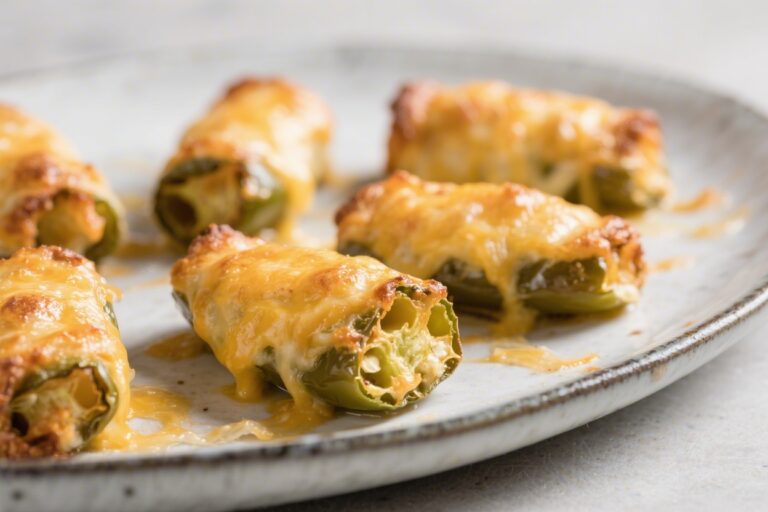
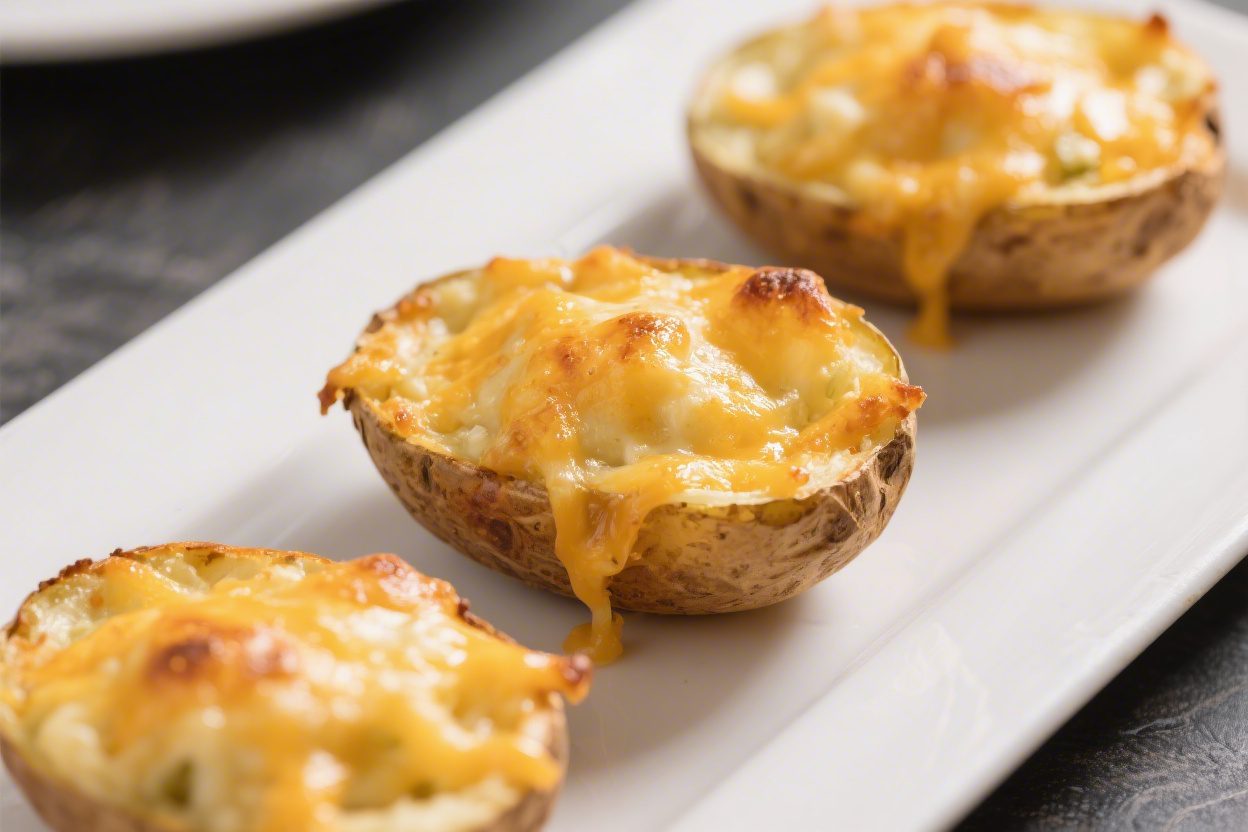
Cheesy Baked Potato Skins – Crispy, Comforting, and Easy
Potato skins are the kind of snack that makes everyone linger near the kitchen, waiting for the tray to come out of the oven. They’re crispy on the edges, fluffy inside, and loaded with melty cheese. You can serve them as a party appetizer, a game-day bite, or a cozy weeknight treat.
They’re also easy to customize with toppings you already have on hand. Best of all, they taste like a splurge but don’t take much effort.
Ingredients
Method
- Preheat and prep: Heat your oven to 425°F (220°C). Line a baking sheet with parchment for easy cleanup. Prick each potato a few times with a fork.
- Roast the potatoes: Rub potatoes with 2 tablespoons olive oil and sprinkle lightly with salt. Place on the baking sheet and roast for 50–60 minutes, turning once, until skins are crisp and a knife slides in easily.
- Cool slightly: Let potatoes cool for 10–15 minutes so they’re easier to handle. Keep the oven on.
- Halve and scoop: Cut each potato lengthwise. Use a spoon to scoop out most of the flesh, leaving about 1/4 inch attached to the skin. Save the scooped potato for another use (mashed potatoes or a quick hash).
- Season the shells: In a small bowl, mix a couple tablespoons of olive oil with the garlic powder, smoked paprika, black pepper, and a pinch of salt. Brush this mixture over the insides and outsides of the potato skins.
- Crisp the skins: Place skins cut-side down on the baking sheet. Bake for 8–10 minutes to crisp. Flip them cut-side up and bake another 5 minutes. This step is key for that sturdy, crunchy bite.
- Add the cheese: Sprinkle shredded cheddar evenly into each shell. Don’t overfill—just a generous layer that will melt nicely without spilling over.
- Melt and finish: Bake for 5–7 minutes, or until the cheese is fully melted and bubbling at the edges. If you want a little char, switch to broil for 1–2 minutes, watching closely.
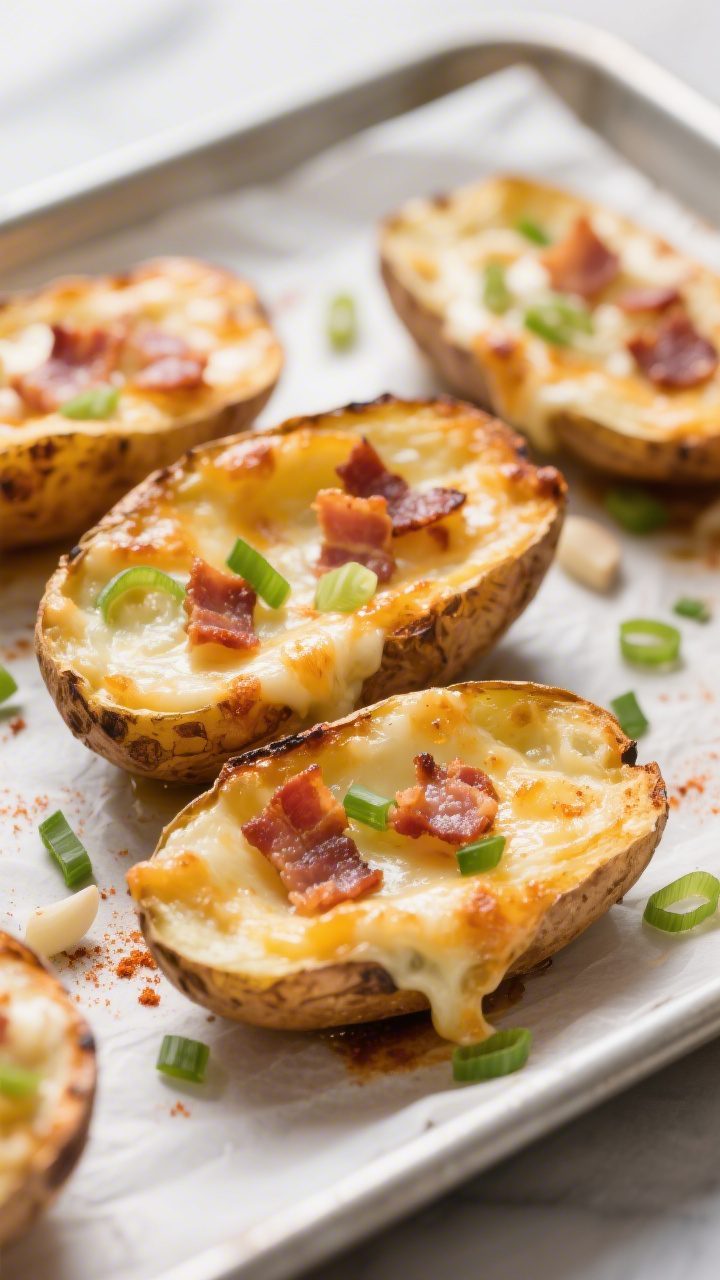
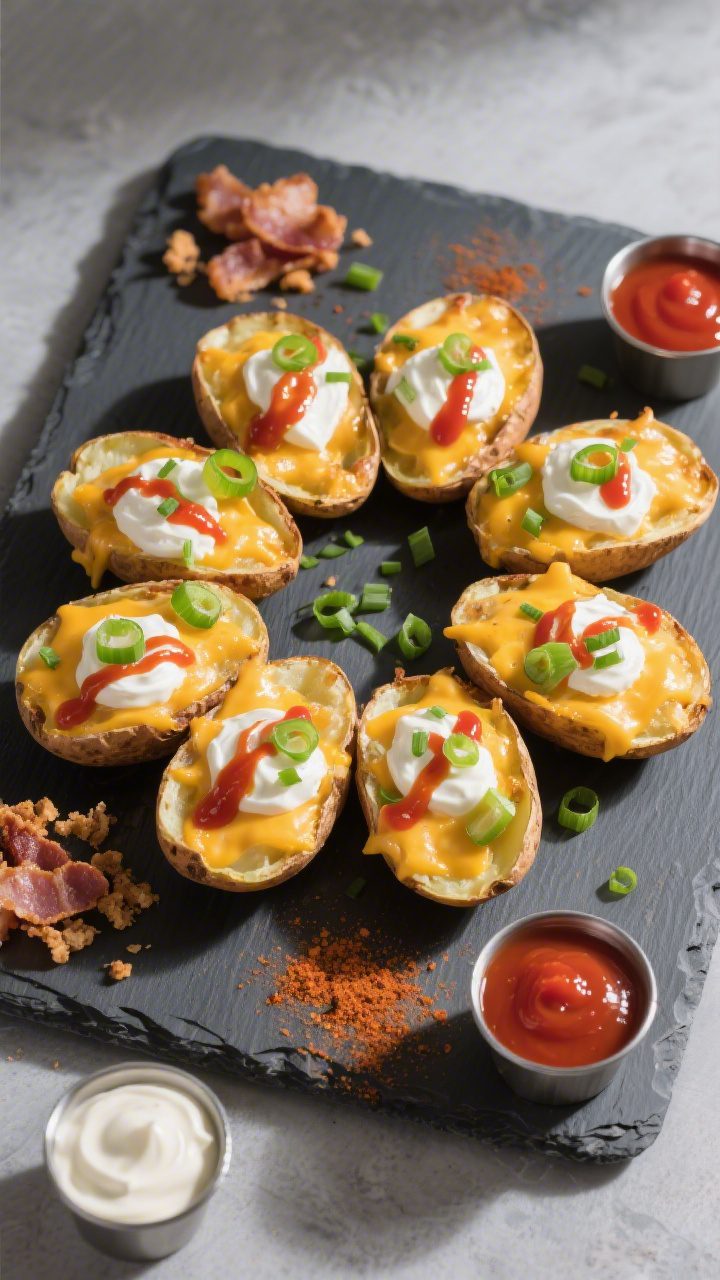
- Top and serve: Remove from the oven and immediately add crumbled bacon (if using). Finish with sour cream, green onions, and chives. Add a dash of hot sauce if you like heat. Serve hot.
What Makes This Special
These cheesy baked potato skins deliver the perfect balance of crunchy edges and creamy centers. Roasting the potatoes first gives the flesh a soft, buttery texture, while a quick broil at the end crisps the skins and melts the cheese.
You control the toppings and salt level, so they come out just how you like them. They’re also budget-friendly and great for feeding a crowd. Plus, you can prep parts of the recipe ahead, making it weeknight-friendly.
What You’ll Need
- 6 medium russet potatoes (scrubbed and dried)
- 2 tablespoons olive oil (plus more for brushing)
- 1 teaspoon kosher salt (divided, to taste)
- 1/2 teaspoon black pepper
- 1/2 teaspoon garlic powder
- 1/2 teaspoon smoked paprika (optional, for a subtle smoky note)
- 1 1/2 to 2 cups shredded cheddar cheese (or a cheddar-jack blend)
- 4 slices bacon (cooked and crumbled; optional)
- 1/3 cup sour cream
- 2–3 green onions (thinly sliced)
- Fresh chives (optional, for garnish)
- Hot sauce (optional, for serving)
How to Make It
- Preheat and prep: Heat your oven to 425°F (220°C).
Line a baking sheet with parchment for easy cleanup. Prick each potato a few times with a fork.
- Roast the potatoes: Rub potatoes with 2 tablespoons olive oil and sprinkle lightly with salt. Place on the baking sheet and roast for 50–60 minutes, turning once, until skins are crisp and a knife slides in easily.
- Cool slightly: Let potatoes cool for 10–15 minutes so they’re easier to handle.
Keep the oven on.
- Halve and scoop: Cut each potato lengthwise. Use a spoon to scoop out most of the flesh, leaving about 1/4 inch attached to the skin. Save the scooped potato for another use (mashed potatoes or a quick hash).
- Season the shells: In a small bowl, mix a couple tablespoons of olive oil with the garlic powder, smoked paprika, black pepper, and a pinch of salt.
Brush this mixture over the insides and outsides of the potato skins.
- Crisp the skins: Place skins cut-side down on the baking sheet. Bake for 8–10 minutes to crisp. Flip them cut-side up and bake another 5 minutes.
This step is key for that sturdy, crunchy bite.
- Add the cheese: Sprinkle shredded cheddar evenly into each shell. Don’t overfill—just a generous layer that will melt nicely without spilling over.
- Melt and finish: Bake for 5–7 minutes, or until the cheese is fully melted and bubbling at the edges. If you want a little char, switch to broil for 1–2 minutes, watching closely.
- Top and serve: Remove from the oven and immediately add crumbled bacon (if using).
Finish with sour cream, green onions, and chives. Add a dash of hot sauce if you like heat. Serve hot.
Storage Instructions
Store leftover potato skins in an airtight container in the fridge for up to 3 days.
For best results, reheat in a 375°F (190°C) oven or air fryer for 8–10 minutes, until the skins re-crisp and the cheese warms through. Avoid microwaving if you can—it softens the skins and makes them soggy. If you know you’ll have leftovers, add the fresh toppings (sour cream, green onions) after reheating to keep them fresh and bright.

Why This is Good for You
While potato skins are a comfort food, they can still fit into a balanced approach to eating.
Potatoes offer fiber, potassium, and vitamin C, especially when you keep the skins on. Using olive oil instead of butter keeps the fat profile more heart-friendly. You can bump up protein with Greek yogurt instead of sour cream and add fiber with toppings like black beans or sautéed vegetables.
As always, portion size matters—pair a few skins with a fresh salad or a bowl of soup for a satisfying meal.
What Not to Do
- Don’t skip the double-bake step. Skipping the crisping phase leads to floppy skins that won’t hold toppings well.
- Don’t use waxy potatoes. Russets work best because their skins crisp up and the interiors get fluffy. Red or gold potatoes tend to be too moist and thin-skinned.
- Don’t oversalt. Cheese and bacon are already salty. Season lightly, taste, then adjust.
- Don’t over-scoop. Leave a 1/4-inch layer of potato for structure.
If you go too thin, they’ll tear.
- Don’t pile on wet toppings before baking. Add fresh toppings after the cheese melts to avoid sogginess.
Recipe Variations
- Buffalo Chicken Skins: Toss shredded cooked chicken with buffalo sauce. Add to the skins with mozzarella or Monterey Jack. Top with thinly sliced celery and a drizzle of ranch or blue cheese dressing.
- Veggie Supreme: Sauté diced bell peppers, onions, and mushrooms.
Add to the skins with pepper jack and finish with avocado and cilantro.
- Taco-Style: Season the potato flesh you scooped out with taco seasoning and mix with black beans and corn. Spoon a bit back into each shell, top with cheddar, and bake. Finish with salsa and lime crema.
- Broccoli Cheddar: Steam small broccoli florets until crisp-tender.
Add to the skins with sharp cheddar and a pinch of garlic powder. Great for kids and a nice way to add greens.
- Breakfast Skins: Fill with soft-scrambled eggs, cheddar, and crumbled breakfast sausage. Top with chives and a little hot sauce.
- Lightened-Up: Use part-skim cheese, swap sour cream for Greek yogurt, and top with pico de gallo instead of bacon.
FAQ
Can I make these ahead of time?
Yes.
Roast, scoop, and crisp the empty shells up to a day ahead. Store them in the fridge. When you’re ready to serve, add cheese and toppings, then bake until hot and bubbly.
Do I have to use russet potatoes?
Russets are best for structure and crunch.
If you must substitute, choose large Yukon Golds and adjust baking time, but expect a slightly softer skin.
What’s the best way to cook the bacon?
Bake it on a sheet at 400°F (205°C) for 12–15 minutes until crisp. It’s hands-off and evenly cooked. Drain on paper towels and crumble.
Can I make them vegetarian?
Absolutely.
Skip the bacon and use toppings like sautéed mushrooms, black beans, roasted corn, or a sprinkle of smoked paprika for a savory kick.
How do I keep the skins from getting soggy?
Brush them with oil and seasonings, then bake cut-side down first. Add fresh toppings after baking, and reheat in the oven or air fryer, not the microwave.
What cheese melts best?
Freshly shredded cheddar melts smoothly and gives the classic flavor. For extra pull, mix in Monterey Jack or mozzarella.
Avoid pre-shredded cheese if possible, as anti-caking agents can affect melting.
Can I freeze potato skins?
Yes, but freeze them without fresh toppings. After crisping the empty shells, fill with cheese, then freeze on a tray until solid. Transfer to a freezer bag for up to 2 months.
Bake from frozen at 400°F (205°C) for 15–20 minutes, adding toppings at the end.
What should I do with the scooped potato?
Make quick mashed potatoes, fold into scrambled eggs, form into potato pancakes, or stir with a little butter and herbs as a simple side.
In Conclusion
Cheesy baked potato skins are simple, crowd-pleasing, and endlessly flexible. With a few pantry staples and a smart double-bake, you get crispy edges, melted cheese, and all the comforting flavors you love. Keep the basic method in your back pocket, then switch up toppings to match your mood or what’s in the fridge.
Serve them hot, pass the napkins, and watch them disappear fast.
Printable Recipe Card
Want just the essential recipe details without scrolling through the article? Get our printable recipe card with just the ingredients and instructions.