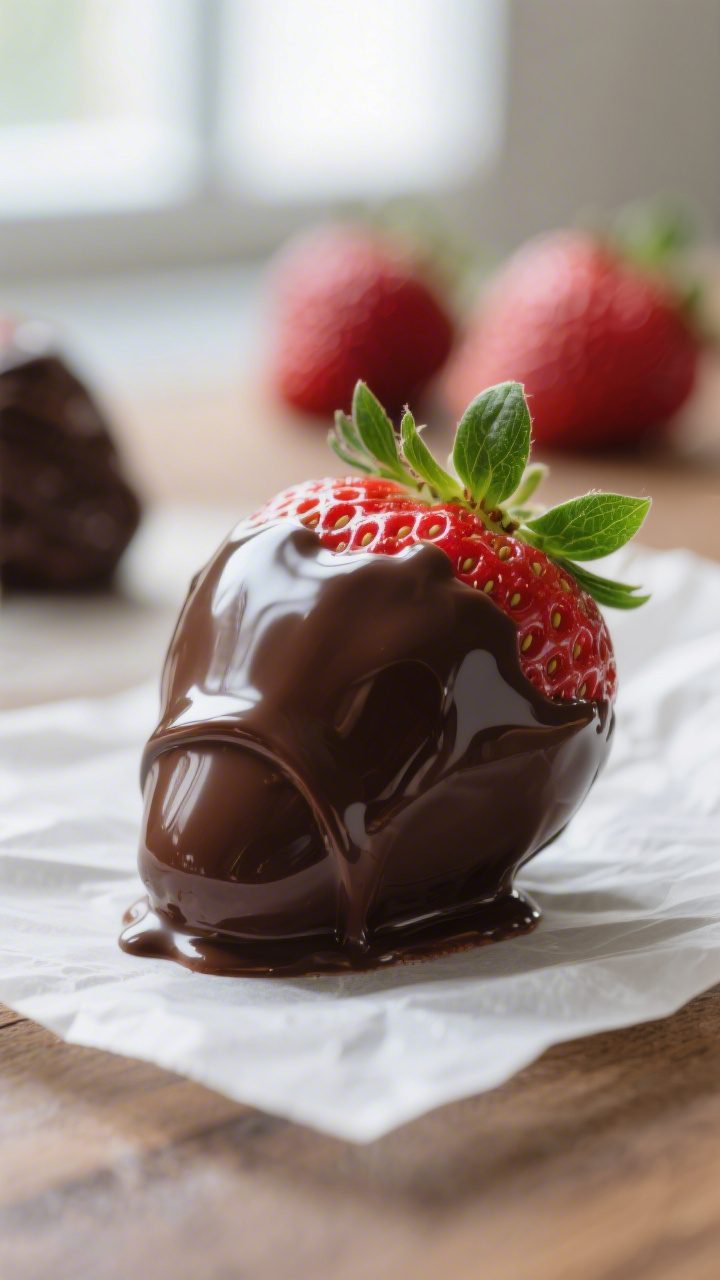
Chocolate Covered Strawberries (Party-Ready) – Simple, Elegant, and Delicious
Chocolate covered strawberries are the kind of treat that looks fancy but takes surprisingly little effort. They hit that sweet spot between fresh and indulgent, and they never last long on a dessert table. Whether you’re hosting a party, celebrating something special, or just want an easy win, this recipe delivers.
You don’t need pastry-chef skills, just a handful of tips and a little patience. Let’s make strawberries that look polished, taste rich, and hold up long enough to impress.

Chocolate Covered Strawberries (Party-Ready) - Simple, Elegant, and Delicious
Ingredients
Method
- Choose and Prep Strawberries: Pick strawberries that are bright, firm, and dry with fresh green tops. Rinse them gently, then dry them completely with paper towels. Any moisture will cause the chocolate to seize or slip off.
- Line Your Tray: Place parchment paper or a silicone mat on a baking sheet. This prevents sticking and gives you a clean release once set.
- Melt the Chocolate (Microwave Method): Add chocolate chips to a heatproof bowl with 1 teaspoon of oil. Microwave in 20–30 second bursts, stirring each time, until smooth. If it looks thick, add another 1/2–1 teaspoon oil. Do not overheat.
- Or Use a Double Boiler: Set a heatproof bowl over a pot of barely simmering water. Stir the chocolate and oil until melted and glossy. Keep the water at a low simmer to avoid scorching.
- Test the Consistency: Dip a spoon and let excess drip. The chocolate should flow smoothly and coat without clumping. If it’s too thick, add a few drops of oil and stir.
- Dip the Strawberries: Hold each strawberry by the green leaves. Dip and swirl to coat about 3/4 of the berry, letting excess drip off. Lightly swipe the bottom on the bowl’s edge to remove extra.
- Set on the Tray: Place dipped strawberries on the lined sheet. Space them so they don’t touch. Work fairly quickly; if the chocolate starts to thicken, rewarm for 10–15 seconds.
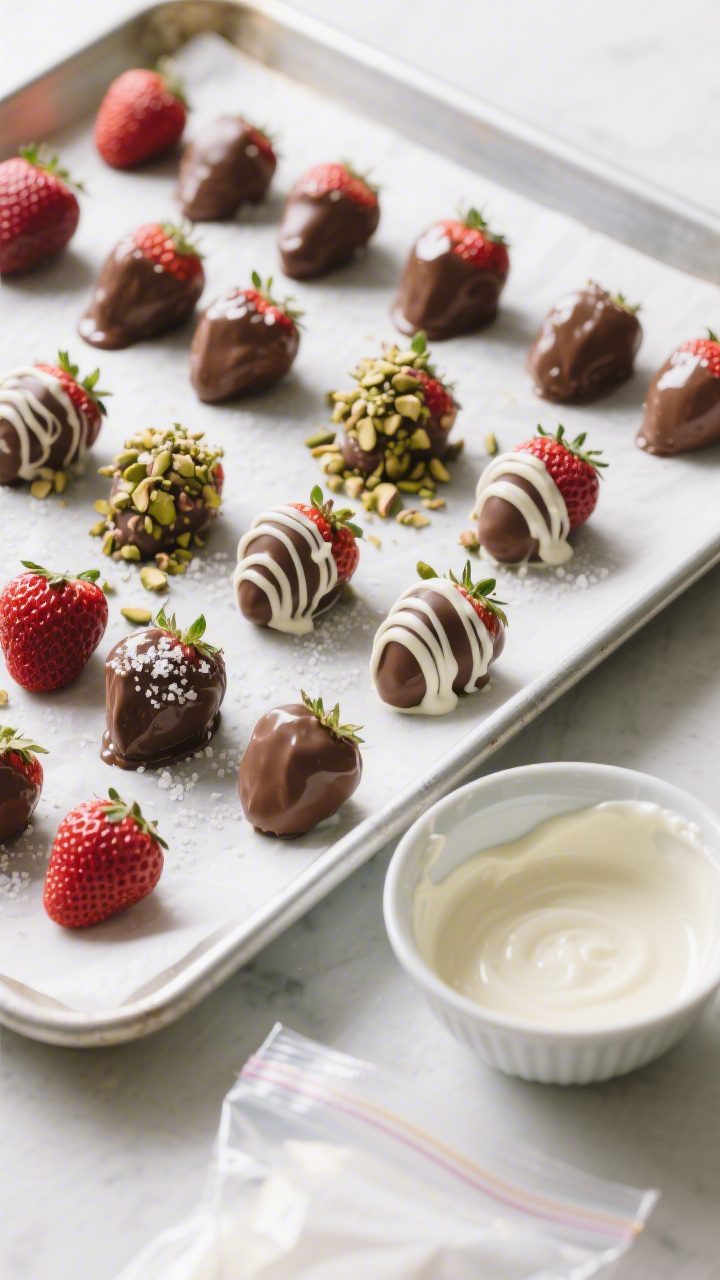
- Add Toppings (Optional): While the coating is still wet, sprinkle with nuts, coconut, or sprinkles. For a clean look, wait and do a white chocolate drizzle later.
- Drizzle Detail: Melt white chocolate in short bursts. Transfer to a small zip-top bag, snip a tiny corner, and drizzle thin lines over set strawberries for a bakery finish.
- Let Them Set: Allow to set at room temperature for about 30–45 minutes, or refrigerate for 15 minutes to speed things up. Don’t leave them in the fridge too long or condensation can form later.
- Plate and Serve: Arrange on a platter just before serving. If you need to stack, use parchment between layers to protect the shells.
Why This Recipe Works
It’s all about balance and technique. Dry strawberries + properly melted chocolate equal a smooth, glossy shell that sets beautifully. We use the microwave or a double boiler for fuss-free melting and add a touch of oil for shine and snap.
A short rest at room temperature helps the chocolate set without streaks. With smart prep and a few minutes of hands-on time, you’ll get bakery-style results at home.
What You’ll Need
- 1 pound fresh strawberries, firm and ripe with green tops intact
- 8 ounces semi-sweet or dark chocolate chips (or chopped bar chocolate)
- 1–2 teaspoons neutral oil (coconut, avocado, or vegetable) for shine and smoothness
- Optional for garnish: white chocolate (2–3 ounces) for drizzling, crushed nuts, sprinkles, toasted coconut, or flaky sea salt
- Tools: parchment paper or a silicone mat, baking sheet, heatproof bowl, microwave or double boiler, paper towels, and a small zip-top bag (for drizzles)
Step-by-Step Instructions
- Choose and Prep Strawberries: Pick strawberries that are bright, firm, and dry with fresh green tops. Rinse them gently, then dry them completely with paper towels.
Any moisture will cause the chocolate to seize or slip off.
- Line Your Tray: Place parchment paper or a silicone mat on a baking sheet. This prevents sticking and gives you a clean release once set.
- Melt the Chocolate (Microwave Method): Add chocolate chips to a heatproof bowl with 1 teaspoon of oil. Microwave in 20–30 second bursts, stirring each time, until smooth.
If it looks thick, add another 1/2–1 teaspoon oil. Do not overheat.
- Or Use a Double Boiler: Set a heatproof bowl over a pot of barely simmering water. Stir the chocolate and oil until melted and glossy.
Keep the water at a low simmer to avoid scorching.
- Test the Consistency: Dip a spoon and let excess drip. The chocolate should flow smoothly and coat without clumping. If it’s too thick, add a few drops of oil and stir.
- Dip the Strawberries: Hold each strawberry by the green leaves.
Dip and swirl to coat about 3/4 of the berry, letting excess drip off. Lightly swipe the bottom on the bowl’s edge to remove extra.
- Set on the Tray: Place dipped strawberries on the lined sheet. Space them so they don’t touch.
Work fairly quickly; if the chocolate starts to thicken, rewarm for 10–15 seconds.
- Add Toppings (Optional): While the coating is still wet, sprinkle with nuts, coconut, or sprinkles. For a clean look, wait and do a white chocolate drizzle later.
- Drizzle Detail: Melt white chocolate in short bursts. Transfer to a small zip-top bag, snip a tiny corner, and drizzle thin lines over set strawberries for a bakery finish.
- Let Them Set: Allow to set at room temperature for about 30–45 minutes, or refrigerate for 15 minutes to speed things up. Don’t leave them in the fridge too long or condensation can form later.
- Plate and Serve: Arrange on a platter just before serving.
If you need to stack, use parchment between layers to protect the shells.
Keeping It Fresh
Chocolate covered strawberries are best the day they’re made. For short-term storage, refrigerate uncovered on a parchment-lined tray for up to 24 hours. If you need to hold them longer, lightly tent with foil; plastic wrap can trap moisture and cause weeping.
Before serving, let them sit at room temperature for 10–15 minutes to soften the chocolate slightly. Avoid humid environments, which can dull the shine and cause condensation.
Health Benefits
- Antioxidants: Strawberries and dark chocolate both offer antioxidants, including flavonoids and vitamin C.
- Fiber and Satiety: The fruit adds fiber, helping these feel more satisfying than many bite-sized sweets.
- Portion-Friendly: Built-in portion control means you can enjoy a treat without going overboard.
- Lower Sugar Options: Choosing dark chocolate (70%+) reduces added sugar compared to milk chocolate.
Pitfalls to Watch Out For
- Wet Strawberries: Any moisture prevents the chocolate from sticking and can make it seize. Dry thoroughly, including around the leaves.
- Overheating Chocolate: This causes grainy, dull results.
Melt low and slow, stirring often.
- Condensation: Long fridge time or humid rooms lead to sweating and streaks. Chill briefly, then store cool and dry.
- Thick Coating: Too-thick chocolate makes heavy shells that crack. A teaspoon of oil keeps the coating thin and glossy.
- Rushing the Set: Handling before fully set leaves fingerprints or dents.
Give them time.
Variations You Can Try
- Two-Tone Dips: Dip in dark chocolate, let set, then dip the tip in white chocolate for a tuxedo look.
- Nutty Crunch: Roll the wet chocolate in finely chopped pistachios, almonds, or hazelnuts.
- Salted Chocolate: Finish with a whisper of flaky sea salt for contrast.
- Coconut Snow: Sprinkle toasted coconut over the wet coating.
- Dessert Bar Style: Offer bowls of mini chips, crushed freeze-dried raspberries, or cookie crumbs for guests to customize.
- Flavored Chocolate: Stir in a drop of peppermint or orange extract for a twist. Go light—extracts are strong.
FAQ
Do I have to use fresh strawberries?
Yes. Frozen strawberries release water as they thaw, which prevents the chocolate from adhering and creates a messy, weepy coating.
Can I make these a day ahead?
Yes, with care.
Make them the day before and refrigerate uncovered on a parchment-lined tray. Bring to room temperature for 10–15 minutes before serving to reduce condensation.
What’s the best chocolate to use?
Use good-quality semi-sweet or dark chocolate chips or bars. If using bars, chop evenly so they melt smoothly.
Couverture chocolate gives the glossiest finish, but regular baking chocolate works well with a bit of oil.
Do I need to temper the chocolate?
Not for this quick method. Adding a little oil gives shine without the fuss of tempering. If you want a snappier shell and no refrigeration, tempering is ideal but optional.
How do I prevent the leaves from getting chocolate on them?
Hold the strawberry by the greens and gently pull them back as you dip.
Rotate the berry to coat evenly, then release the leaves once you place it on the tray.
Why is my chocolate thick and lumpy?
It may have overheated or come into contact with water. Start over with fresh chocolate, melt slowly, and ensure your bowl and tools are completely dry.
Can I use white chocolate for the whole coating?
Yes, but be gentle with heat—white chocolate scorches easily. Add a little oil to keep it smooth and glossy.
How do I make neat drizzles?
Melt a small amount of chocolate, transfer it to a zip-top bag, and snip a tiny corner.
Practice a few lines on parchment first, then drizzle in quick, steady motions.
What if I don’t have parchment paper?
Use a silicone baking mat or lightly oiled foil. Avoid wax paper in warm environments as it can stick.
How long do they last?
They’re best within 24 hours. After that, the strawberries can soften and the chocolate may bloom or sweat, especially in humid conditions.
In Conclusion
Chocolate covered strawberries are the definition of effortless elegance.
With dry berries, gently melted chocolate, and a few smart finishing touches, you’ll have a tray that looks party-perfect and tastes even better. Keep the method simple, avoid excess moisture, and let them set fully. You’ll have a reliable, crowd-pleasing dessert that feels special every single time.
Printable Recipe Card
Want just the essential recipe details without scrolling through the article? Get our printable recipe card with just the ingredients and instructions.