Chicken Pot Pie (Freezer-Ready) – Cozy Comfort You Can Make Ahead
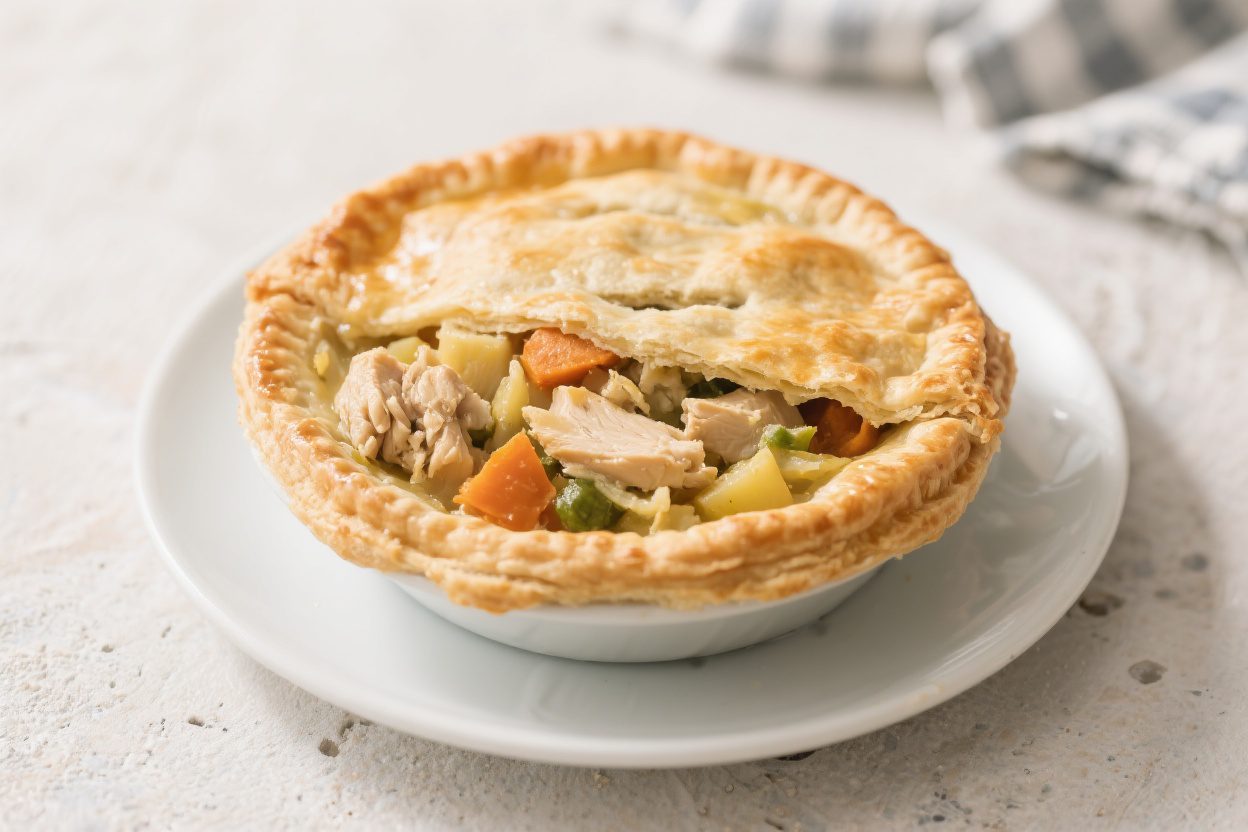
There’s nothing better than pulling a homemade chicken pot pie from the freezer and sliding it straight into the oven. It’s hearty, comforting, and tastes like you cooked all afternoon—even on your busiest days. This version is creamy without being heavy, packed with tender chicken and vegetables, and topped with a flaky, golden crust.
Make one for tonight and one for later, or prep a few to stash away. Future you will be very happy.
Ingredients
Method
- Sauté the aromatics. In a large skillet or pot, melt the butter over medium heat. Add onion, celery, and carrots. Cook until softened, about 6–8 minutes. Stir in garlic and thyme for the last minute.
- Build the roux. Sprinkle flour over the vegetables and stir for 1–2 minutes. The mixture will look thick and slightly pasty. This step removes the raw flour taste and helps the sauce thicken later.
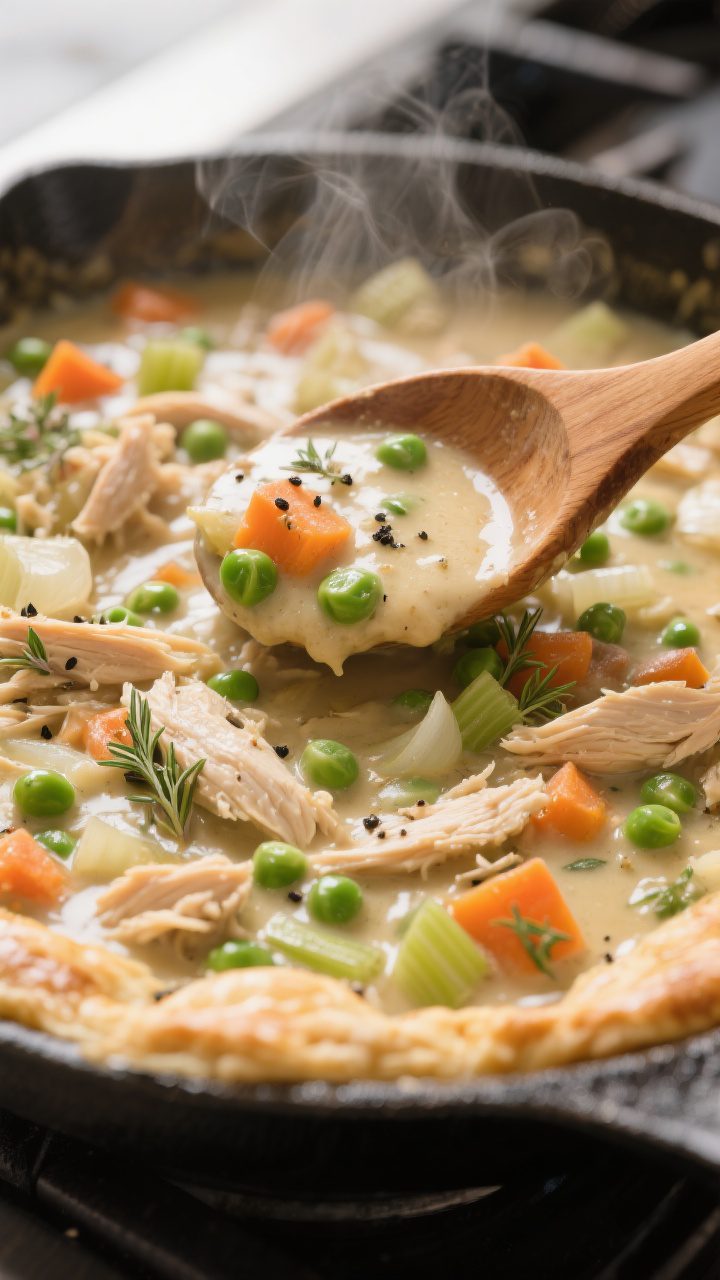
- Add the liquids. Slowly whisk in chicken broth, then milk or half-and-half. Keep stirring until the sauce is smooth and begins to simmer. Cook 3–4 minutes, until it thickly coats a spoon.
- Stir in chicken and peas. Add the cooked chicken and peas. Season well with salt and black pepper. Taste and adjust—this is your moment to get the seasoning right.
- Cool the filling. Take the pan off the heat and let the filling cool to room temperature. Do not add hot filling to a crust or you risk a soggy bottom and steam-related cracks when freezing.
- Assemble the pie. Line a 9-inch pie dish with the bottom crust. Spoon in the cooled filling. Top with the second crust. Trim, crimp the edges, and cut a few slits for steam.
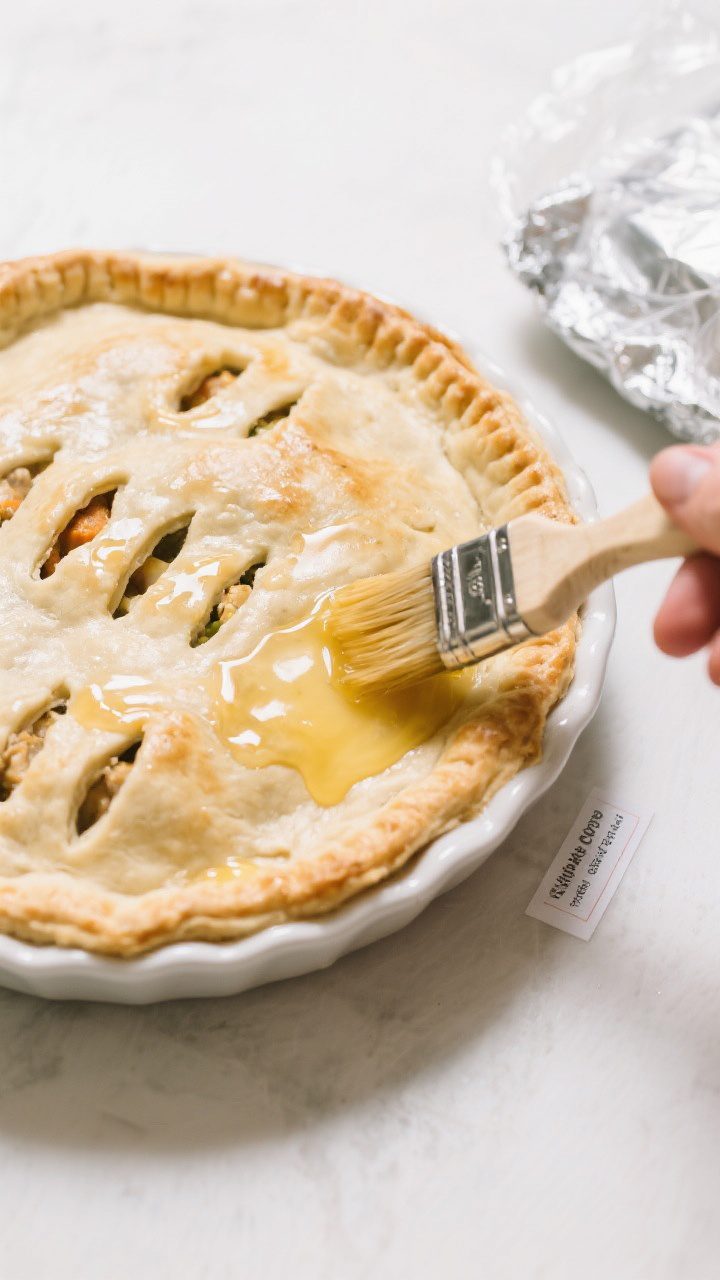
- Add egg wash. Brush the top with the egg wash for color. If freezing, you can also wait to brush just before baking; both options work.
- To bake now: Preheat oven to 400°F (200°C). Place pie on a sheet pan. Bake 35–45 minutes until golden and bubbly. Let rest 10–15 minutes before slicing so the filling can set.
- To freeze unbaked: Wrap the assembled pie tightly with plastic wrap, then foil. Label with date and baking instructions. Freeze for up to 3 months.
- Bake from frozen: Remove plastic, keep foil loosely tented for the first 30 minutes. Bake at 400°F (200°C) for 60–75 minutes total, removing foil when the top is pale golden so it can brown. If the edges brown too fast, shield with foil. Rest 15 minutes before serving.
Why This Recipe Works
This freezer-ready pot pie is built for convenience without sacrificing flavor. The filling starts with a quick stovetop base that gets creamy but stays sturdy after freezing and baking.
We use a mix of fresh aromatics and frozen vegetables for speed and consistency. The crust is kept simple: use store-bought for ease or homemade if you prefer. Either way, the method prevents sogginess and delivers a crisp, flaky top every time.
Another smart move: we cook the chicken ahead of time (or use rotisserie chicken) to avoid overcooking.
The sauce is thickened just enough so it won’t weep when thawed. It’s a true freezer hero—dependable, delicious, and ready when you are.
Shopping List
- Chicken: 3 cups cooked, shredded or diced (rotisserie works great)
- Butter: 6 tablespoons, unsalted
- All-purpose flour: 1/2 cup
- Chicken broth: 2 cups, low-sodium
- Milk or half-and-half: 1 cup
- Onion: 1 medium, diced
- Celery: 2 ribs, diced
- Carrots: 2 medium, diced (or use frozen mixed veggies)
- Frozen peas: 1 cup
- Garlic: 2 cloves, minced
- Fresh thyme or dried thyme: 1 teaspoon dried or 1 tablespoon fresh
- Parsley: 2 tablespoons, chopped (optional)
- Salt and black pepper: to taste
- Pie crust: 1 double crust (store-bought or homemade)
- Egg: 1, beaten with 1 tablespoon water for egg wash
Step-by-Step Instructions
- Sauté the aromatics. In a large skillet or pot, melt the butter over medium heat. Add onion, celery, and carrots.
Cook until softened, about 6–8 minutes. Stir in garlic and thyme for the last minute.
- Build the roux. Sprinkle flour over the vegetables and stir for 1–2 minutes. The mixture will look thick and slightly pasty.
This step removes the raw flour taste and helps the sauce thicken later.
- Add the liquids. Slowly whisk in chicken broth, then milk or half-and-half. Keep stirring until the sauce is smooth and begins to simmer. Cook 3–4 minutes, until it thickly coats a spoon.
- Stir in chicken and peas. Add the cooked chicken and peas.
Season well with salt and black pepper. Taste and adjust—this is your moment to get the seasoning right.
- Cool the filling. Take the pan off the heat and let the filling cool to room temperature. Do not add hot filling to a crust or you risk a soggy bottom and steam-related cracks when freezing.
- Assemble the pie. Line a 9-inch pie dish with the bottom crust. Spoon in the cooled filling.
Top with the second crust. Trim, crimp the edges, and cut a few slits for steam.
- Add egg wash. Brush the top with the egg wash for color. If freezing, you can also wait to brush just before baking; both options work.
- To bake now: Preheat oven to 400°F (200°C).
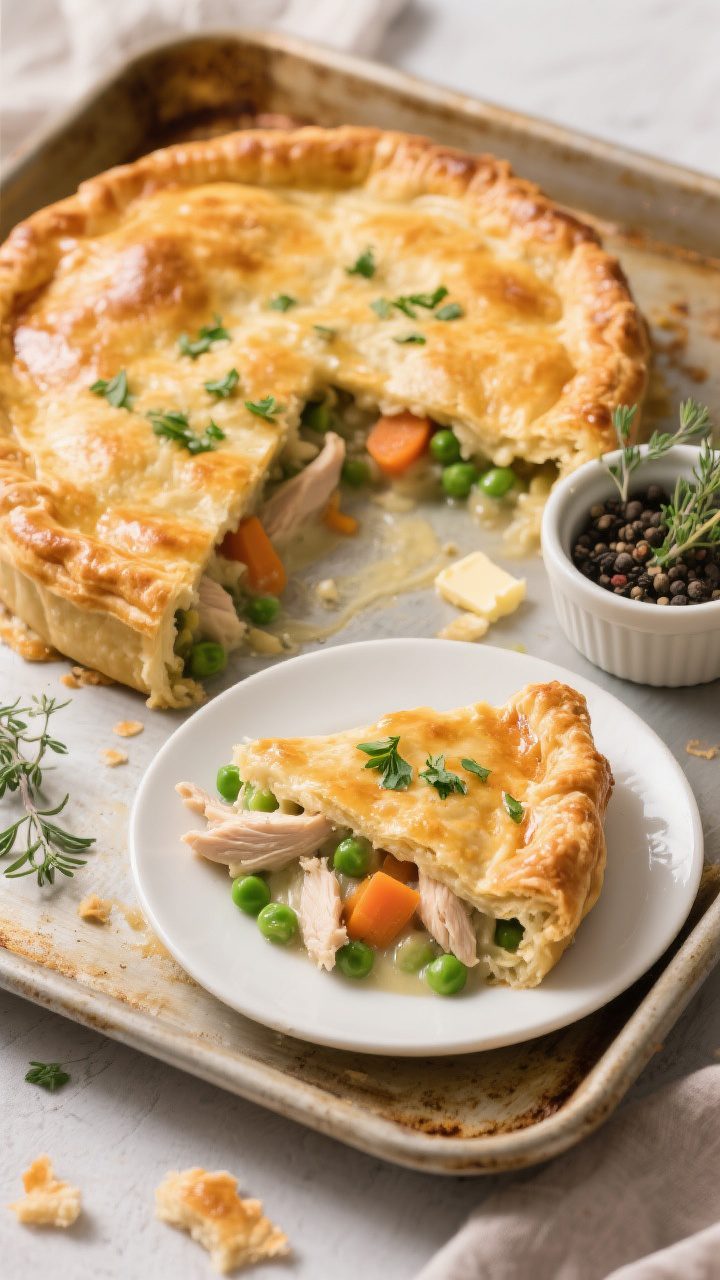
Place pie on a sheet pan. Bake 35–45 minutes until golden and bubbly. Let rest 10–15 minutes before slicing so the filling can set.
- To freeze unbaked: Wrap the assembled pie tightly with plastic wrap, then foil.
Label with date and baking instructions. Freeze for up to 3 months.
- Bake from frozen: Remove plastic, keep foil loosely tented for the first 30 minutes. Bake at 400°F (200°C) for 60–75 minutes total, removing foil when the top is pale golden so it can brown.
If the edges brown too fast, shield with foil. Rest 15 minutes before serving.
How to Store
- Unbaked pie, frozen: Up to 3 months, tightly wrapped in plastic and foil.
- Baked pie, refrigerated: Cool fully, then cover. Keeps 3–4 days.
- Baked pie, frozen: Wrap slices or the whole cooled pie tightly.
Freeze up to 2 months. Reheat covered at 350°F (175°C) until warmed through.
- Leftover filling: Refrigerate up to 3 days or freeze up to 2 months. Great over rice or biscuits.
Health Benefits
This pot pie offers a balanced mix of protein, vegetables, and carbs. Chicken provides lean protein, which helps with fullness and muscle repair.
Carrots, peas, celery, and onions add fiber, vitamins, and antioxidants. Using low-sodium broth keeps salt in check, and milk or half-and-half makes it creamy without heavy cream.
If you want to lighten it up, use an olive oil-based crust, swap half the butter for olive oil, or use more veggies and a bit less crust. You’ll still get comfort-food satisfaction with better nutrition.
What Not to Do
- Don’t fill the pie while the mixture is hot. Hot filling makes the crust soggy and leads to ice crystals when freezing.
- Don’t skip the vent slits. Steam needs an escape route to keep the crust flaky.
- Don’t under-season the filling. The crust is mild, so the filling should be well seasoned.
- Don’t thaw on the counter. For food safety, thaw overnight in the fridge if you choose to thaw.
Baking from frozen works great, too.
- Don’t overfill. Keep the filling slightly below the rim to prevent bubbling over.
Recipe Variations
- Turkey Pot Pie: Perfect for leftovers—swap in cooked turkey.
- Mushroom and Leek: Replace half the chicken with sautéed mushrooms and sliced leeks for a deeper, earthy flavor.
- Herb Lover’s: Add rosemary, extra thyme, and a splash of dry white wine while simmering the sauce.
- Lighter Crust: Use a single top crust or puff pastry sheet. For an ultra-light version, skip the bottom crust and bake in a casserole dish.
- Dairy-Free: Use dairy-free butter and unsweetened plant milk. Thicken with the same amount of flour.
- Gluten-Free: Use a gluten-free flour blend for the roux and a gluten-free pie crust.
Ensure broth is certified gluten-free.
- Extra Veggie: Add corn, green beans, or diced potatoes (par-cook potatoes first).
- Spice It Up: Stir in a pinch of smoked paprika or a dash of hot sauce for warmth.
FAQ
Should I thaw the pie before baking?
You don’t have to. Baking straight from frozen works well. If you prefer to thaw, do it in the fridge overnight and reduce the bake time by about 15–20 minutes.
How do I prevent a soggy bottom crust?
Cool the filling completely before assembling.
You can also brush the bottom crust with beaten egg white to create a moisture barrier, or preheat a sheet pan to help cook the bottom faster.
Can I use puff pastry instead of pie crust?
Yes, especially for the top. Keep it cold, cut a few vents, and bake until deeply golden. Puff pastry browns faster, so check early and tent with foil if needed.
What if my sauce is too thin?
Simmer a few extra minutes to reduce, or mix 1 tablespoon flour with 2 tablespoons milk and whisk it in.
Let it bubble to activate the thickener. Aim for a thick stew-like consistency.
Can I make mini pot pies?
Absolutely. Use ramekins or a muffin tin lined with crust circles.
Reduce bake time to about 20–30 minutes, depending on size. Freeze unbaked minis the same way.
Is rotisserie chicken okay?
It’s ideal. Remove the skin, shred the meat, and fold it into the sauce.
Season to taste, since store-bought rotisserie can vary in saltiness.
How do I know it’s done?
The crust should be golden brown, and the filling should be visibly bubbling through the vents. An instant-read thermometer inserted in the center should read at least 165°F (74°C).
In Conclusion
Chicken pot pie is classic comfort food, and this freezer-ready version makes it weeknight-friendly. With a sturdy, creamy filling and a flaky crust, it bakes up beautifully whether fresh or frozen.
Double the recipe, tuck one away, and enjoy the peace of mind that dinner is always within reach. Warm, satisfying, and simple—that’s a win any night of the week.
Printable Recipe Card
Want just the essential recipe details without scrolling through the article? Get our printable recipe card with just the ingredients and instructions.