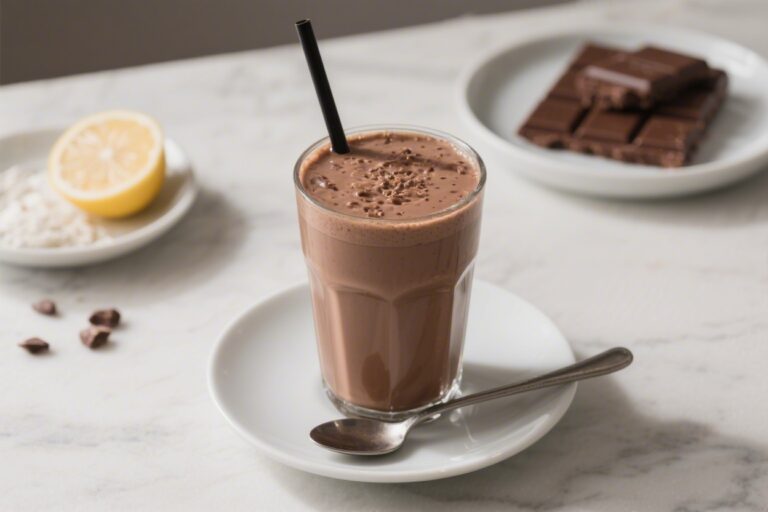
Chocolate Milkshake (Classic Style) – Rich, Creamy, and Foolproof
Nothing beats a cold, classic chocolate milkshake when you’re craving something sweet and nostalgic. It’s the kind of treat that feels special but takes only a few minutes to make. With the right ratio of ice cream, milk, and chocolate, you’ll get that perfect creamy texture every time.
This version keeps things simple, smooth, and deeply chocolatey—no fancy equipment beyond a blender. Whether it’s a late-night snack or a sunny afternoon pick-me-up, this milkshake delivers.
Ingredients
Method
- Soften the ice cream slightly. Let the ice cream sit at room temperature for 5 minutes. It should scoop easily but not melt. This helps the blender work quickly without overmixing.
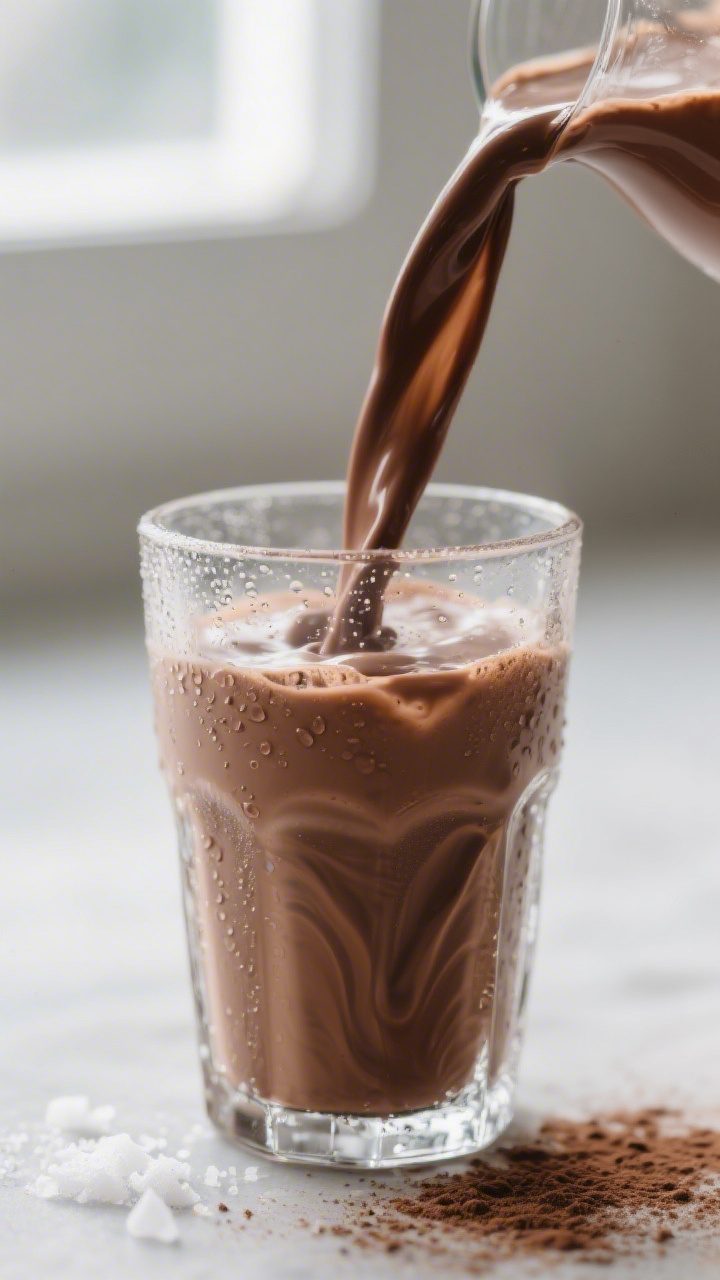
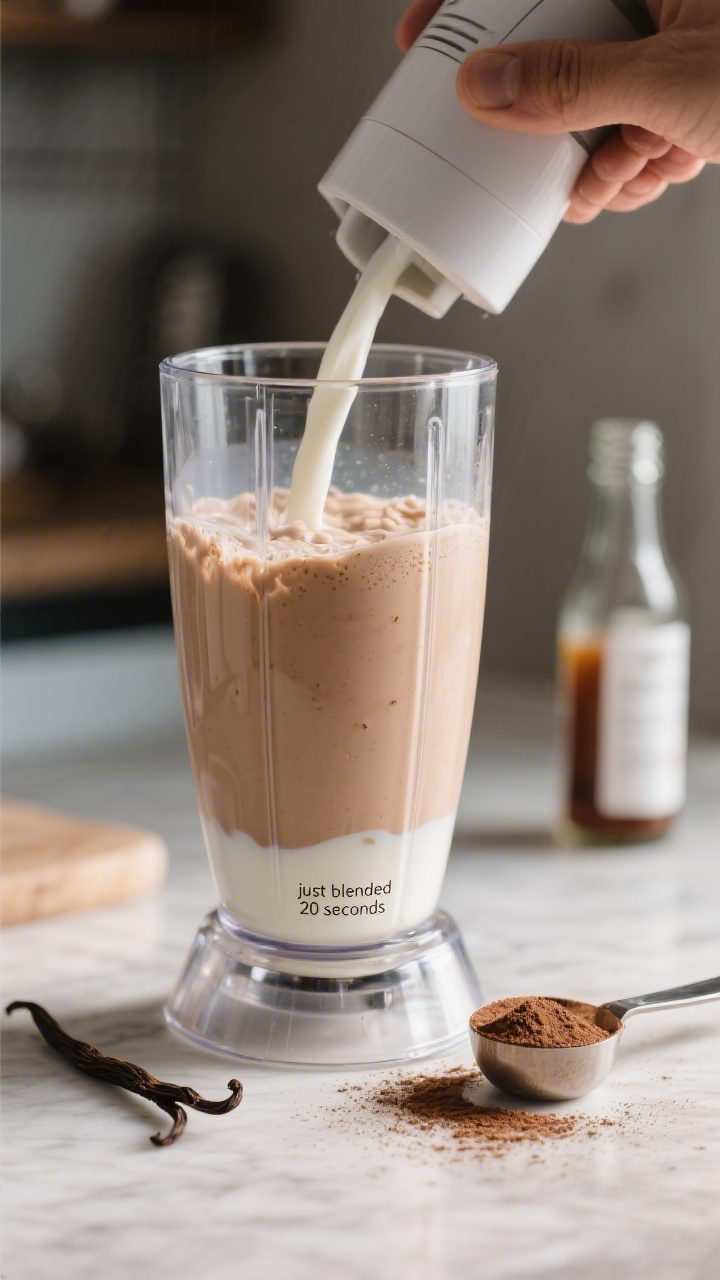
- Prep your blender. Add the milk first. Liquids on the bottom help pull the thicker ingredients down for a smoother blend.
- Add flavor boosters. Spoon in the chocolate syrup and cocoa powder, then add the vanilla and a tiny pinch of salt. These small touches make the chocolate taste fuller and more balanced.
- Add the ice cream. Pile in the scoops gently so the blender blades can grab them. Don’t pack the blender past two-thirds full.
- Blend briefly. Start on low, then go to medium for 15–25 seconds. Stop and check. You want a thick, even pour—no big chunks, no frothy foam. If it’s too thick, add a splash of milk; too thin, add a scoop of ice cream and pulse.
- Taste and tweak. Want more chocolate? Add a teaspoon more cocoa or a drizzle of syrup and blend 5 seconds. Keep adjustments small so you don’t over-thin the shake.
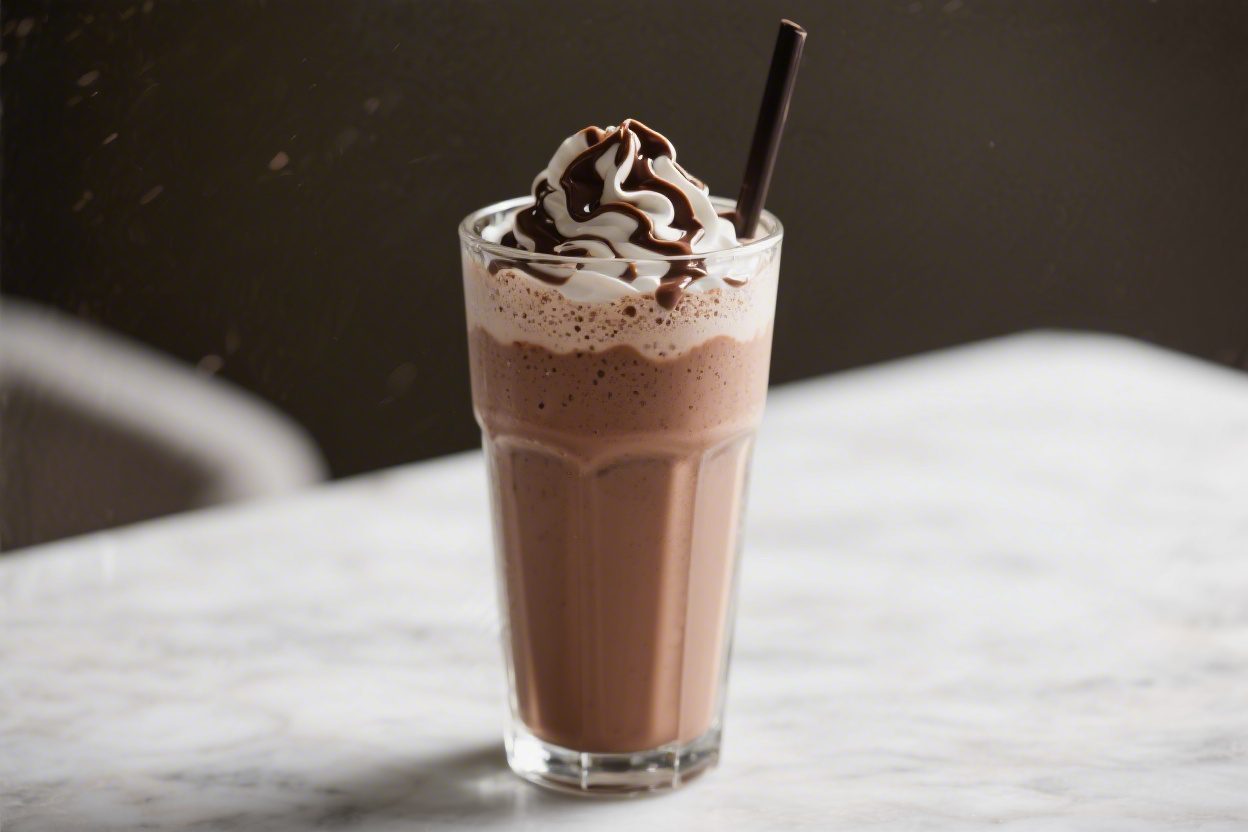
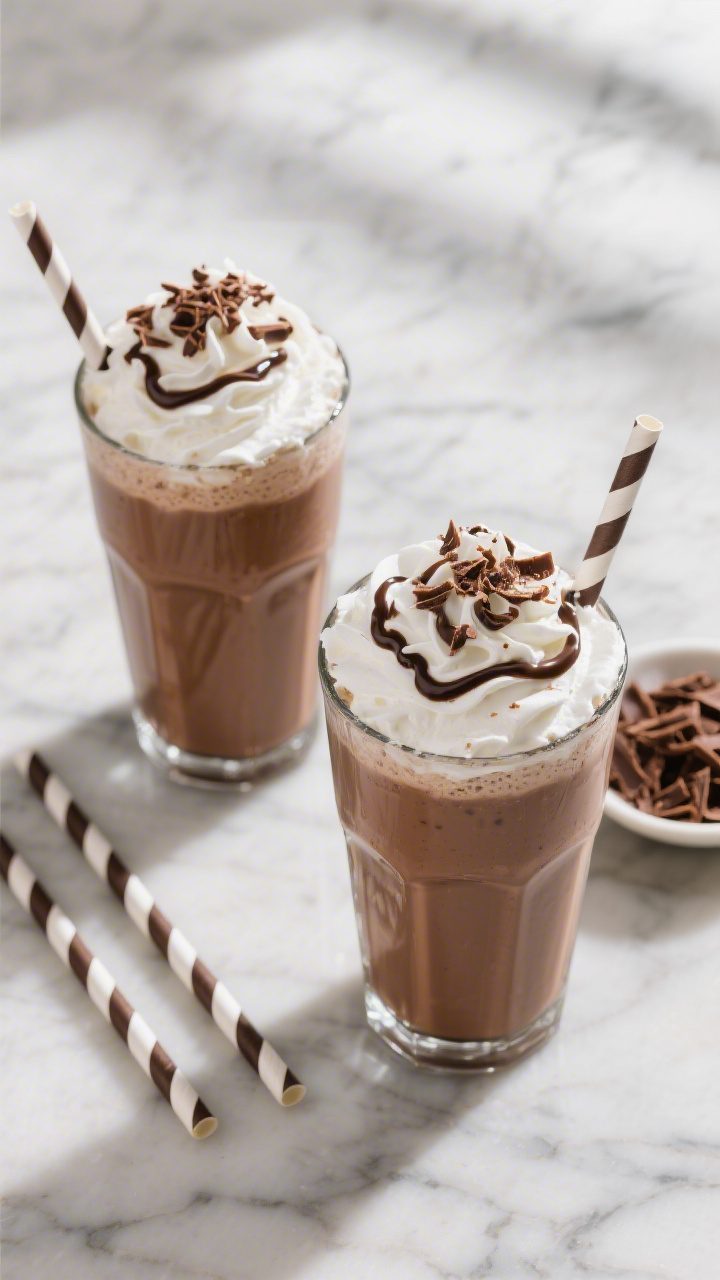
- Serve cold. Pour into chilled glasses for the best texture. Top with whipped cream and a sprinkle of chocolate shavings if you like a diner-style finish.
Why This Recipe Works
This recipe nails the balance of rich chocolate flavor and drinkable creaminess. Ice cream brings body and sweetness, while milk lightens the texture so it sips easily.
A mix of chocolate syrup and cocoa powder gives depth: syrup adds silkiness and sweetness; cocoa adds intensity. A splash of vanilla rounds out the flavors and keeps the chocolate from tasting flat. With a few easy tweaks, you can make it thicker, lighter, or more intense without losing that classic feel.
Ingredients
- 3 cups chocolate ice cream (about 6 large scoops)
- 3/4 to 1 cup cold whole milk (start with 3/4 cup; add more if needed)
- 3 tablespoons chocolate syrup
- 1 tablespoon unsweetened cocoa powder (Dutch-process if you like a deeper flavor)
- 1/2 teaspoon pure vanilla extract
- Pinch of salt (optional, but it sharpens the chocolate)
- Whipped cream, for topping (optional)
- Chocolate shavings or sprinkles, for garnish (optional)
How to Make It
- Soften the ice cream slightly. Let the ice cream sit at room temperature for 5 minutes.
It should scoop easily but not melt. This helps the blender work quickly without overmixing.
- Prep your blender. Add the milk first. Liquids on the bottom help pull the thicker ingredients down for a smoother blend.
- Add flavor boosters. Spoon in the chocolate syrup and cocoa powder, then add the vanilla and a tiny pinch of salt.
These small touches make the chocolate taste fuller and more balanced.
- Add the ice cream. Pile in the scoops gently so the blender blades can grab them. Don’t pack the blender past two-thirds full.
- Blend briefly. Start on low, then go to medium for 15–25 seconds. Stop and check.
You want a thick, even pour—no big chunks, no frothy foam. If it’s too thick, add a splash of milk; too thin, add a scoop of ice cream and pulse.
- Taste and tweak. Want more chocolate? Add a teaspoon more cocoa or a drizzle of syrup and blend 5 seconds.
Keep adjustments small so you don’t over-thin the shake.
- Serve cold. Pour into chilled glasses for the best texture. Top with whipped cream and a sprinkle of chocolate shavings if you like a diner-style finish.
How to Store
Milkshakes are best enjoyed right away. If you must store, freeze for up to 1 hour and re-blend with a splash of milk before serving.
For longer storage, freeze in an airtight container for up to 1 day, then let it soften slightly and stir or re-blend. Avoid refrigerating for long periods—melting and separation will give you a thin, icy drink. Chilled glasses and cold ingredients reduce the need to store in the first place.
Health Benefits
- Calcium and vitamin D: Dairy provides bone-supporting nutrients, especially if you use fortified milk.
- Protein: Whole milk and ice cream contribute protein, which helps with satiety.
- Dark cocoa perks: Unsweetened cocoa contains flavanols, which can support heart health in moderation.
- Energy boost: Natural sugars and fats offer quick energy, useful after workouts or as an occasional treat.
That said, this is a dessert.
If you want a lighter option, see the Alternatives section for swaps that cut sugar and saturated fat without losing the fun.
Pitfalls to Watch Out For
- Overblending: Too much air makes the shake foamy and thin. Blend just until smooth.
- Using only syrup: Syrup brings sweetness but can taste one-note. A bit of cocoa powder adds depth.
- Warm ingredients: If the milk or glasses are warm, the shake melts fast.
Keep everything cold.
- Too little salt: Skipping a pinch can make the chocolate taste muted. Use a tiny amount to brighten flavor.
- Wrong milk-to-ice-cream ratio: Too much milk gives you chocolate milk, not a milkshake; too little makes it spoon-only. Start with the amounts listed and adjust by tablespoons.
Alternatives
- Dairy-free version: Use dairy-free chocolate ice cream and unsweetened almond, oat, or coconut milk.
Oat milk gives the creamiest texture; coconut adds a hint of coconut flavor.
- Lighter option: Swap in reduced-fat ice cream or frozen yogurt and use 2% milk. Add 1–2 teaspoons of cocoa and reduce syrup to keep flavor strong while cutting sugar.
- Extra-chocolatey: Add 1–2 tablespoons of chocolate chips or chunks and pulse a few times for texture. You can also use a darker cocoa powder for a bittersweet edge.
- Mocha twist: Add 1–2 teaspoons of instant espresso powder or a shot of cooled espresso for a coffee-chocolate blend.
- Nutty note: Blend in 1 tablespoon peanut butter, hazelnut spread, or almond butter.
Reduce syrup slightly to keep sweetness in check.
- Mint chocolate: Add 1/8 teaspoon peppermint extract (it’s strong—go light) and garnish with crushed chocolate mints.
- Protein boost: Add a half-scoop of chocolate whey or plant protein. Increase milk by 2–3 tablespoons and blend gently to avoid chalkiness.
FAQ
How do I make the shake thicker?
Use less milk and more ice cream, and blend briefly. You can also freeze the glasses and add a handful of small ice cubes or crushed ice, but do this sparingly to avoid dilution.
What if I don’t have chocolate syrup?
Use 1–2 extra teaspoons of cocoa powder plus 1–2 teaspoons of sugar or maple syrup.
Add a touch more milk if needed to maintain smoothness.
Can I make it without a blender?
Yes. Let the ice cream soften, whisk the cocoa, syrup, vanilla, and a splash of milk together until smooth, then stir in the rest of the milk and softened ice cream. It will be slightly less airy but still delicious.
Which milk works best?
Whole milk gives the creamiest texture. 2% works well, too.
For non-dairy, oat milk is closest in body; almond milk is thinner but still good.
Why add a pinch of salt?
Salt sharpens sweetness and intensifies chocolate flavor without making the shake taste salty. A tiny pinch is enough.
How do I avoid a grainy texture?
Sift the cocoa powder or whisk it with a tablespoon of milk before blending. Blend just long enough to incorporate everything smoothly.
Can I prepare it ahead?
You can blend it, freeze for up to an hour, then re-blend with a splash of milk.
For longer than that, texture suffers, so it’s best made fresh.
What’s the ideal serving size?
This recipe makes about 2 generous servings. For smaller portions, divide into 3 glasses or halve the recipe.
In Conclusion
A classic chocolate milkshake should be simple, cold, and boldly chocolatey, and this recipe checks every box. With a short ingredient list and quick method, it’s an easy win on busy days or cozy nights in.
Stick to the basic ratios, blend just enough, and adjust to taste. In a few minutes, you’ll have a thick, creamy shake that hits all the right nostalgic notes—no shortcuts needed.
Printable Recipe Card
Want just the essential recipe details without scrolling through the article? Get our printable recipe card with just the ingredients and instructions.