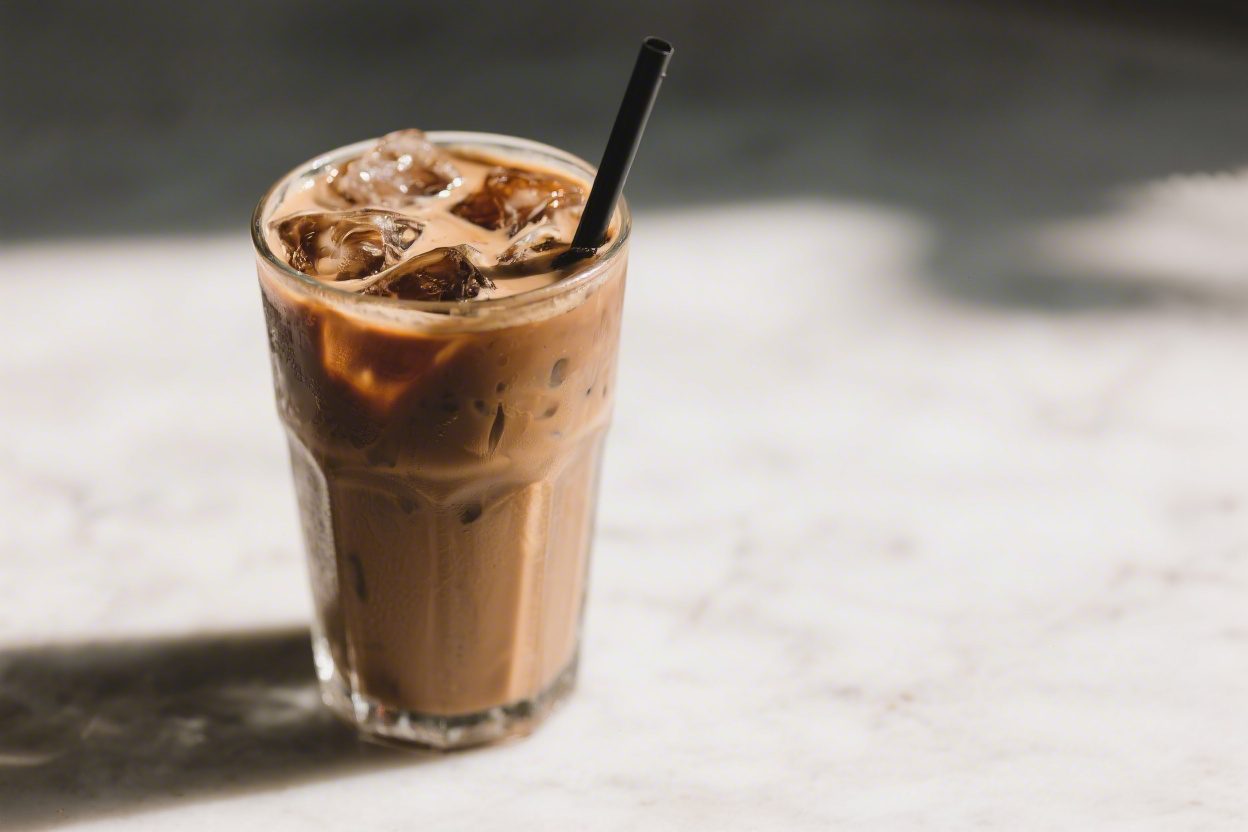
Iced Mocha (No Blender) – Smooth, Chocolatey Coffee You Can Shake
Skip the coffee shop line and make a chilled, chocolatey iced mocha at home in minutes—no blender needed. This version is creamy, refreshing, and surprisingly simple, relying on a quick shake and a good stir. You’ll use strong coffee, cocoa, and milk to build a drink that tastes like dessert but feels balanced.
It’s easy to customize, too, whether you prefer it dairy-free or extra bold. Grab a jar, some ice, and you’re halfway there.
Ingredients
Method
- Brew and cool your coffee: Make a strong batch—about double strength. Let it cool to room temp or chill it. You’ll need roughly 3/4 to 1 cup per serving.
- Make a quick chocolate syrup: In a small bowl or mug, stir together 1 to 1.5 tablespoons unsweetened cocoa powder, 1 to 2 tablespoons sugar, and 1 tablespoon hot water. Mix until smooth and glossy. Add a tiny pinch of salt and a few drops of vanilla if you like.
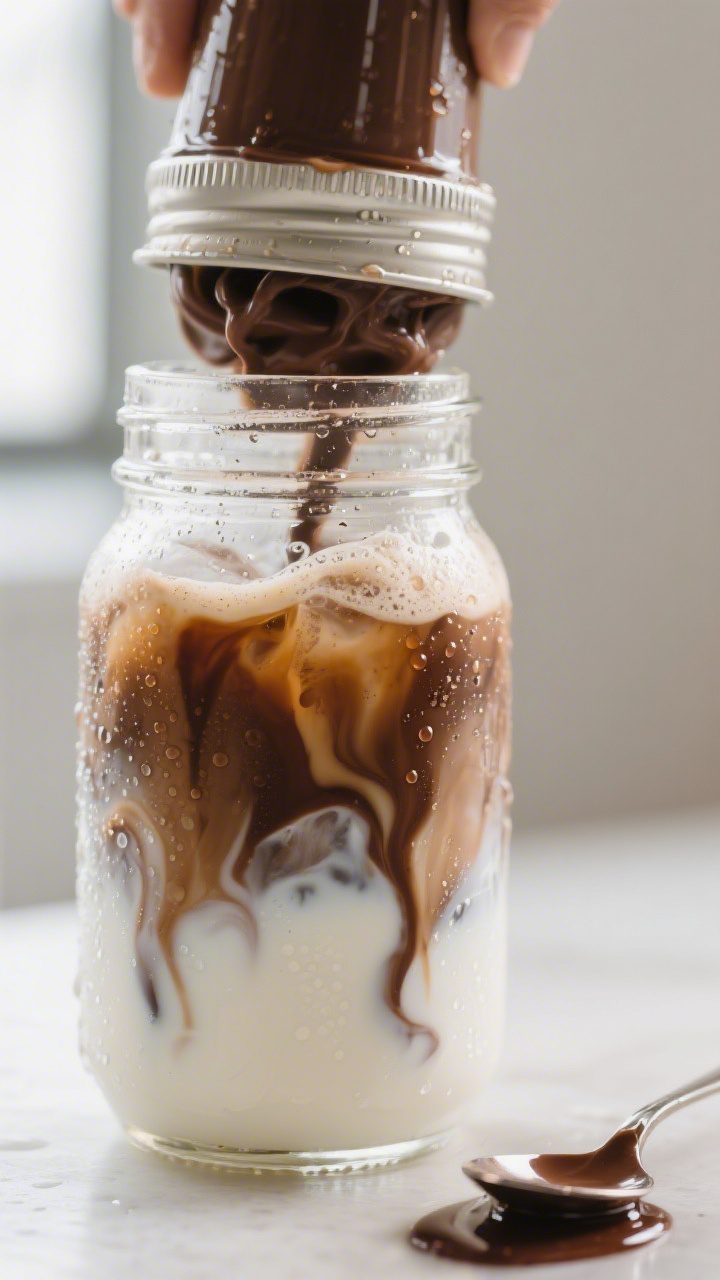
- Shake with milk: Add 1/2 cup milk to the chocolate syrup and stir until fully combined. For extra froth, pour this mixture into a jar with a tight lid and shake for 10–15 seconds.
- Combine with coffee: Fill a tall glass with ice. Pour in the cooled coffee, then add the chocolate-milk mixture. Stir well to blend.
- Taste and adjust: Add more milk for creaminess, more coffee for strength, or a splash of simple syrup if you want it sweeter.
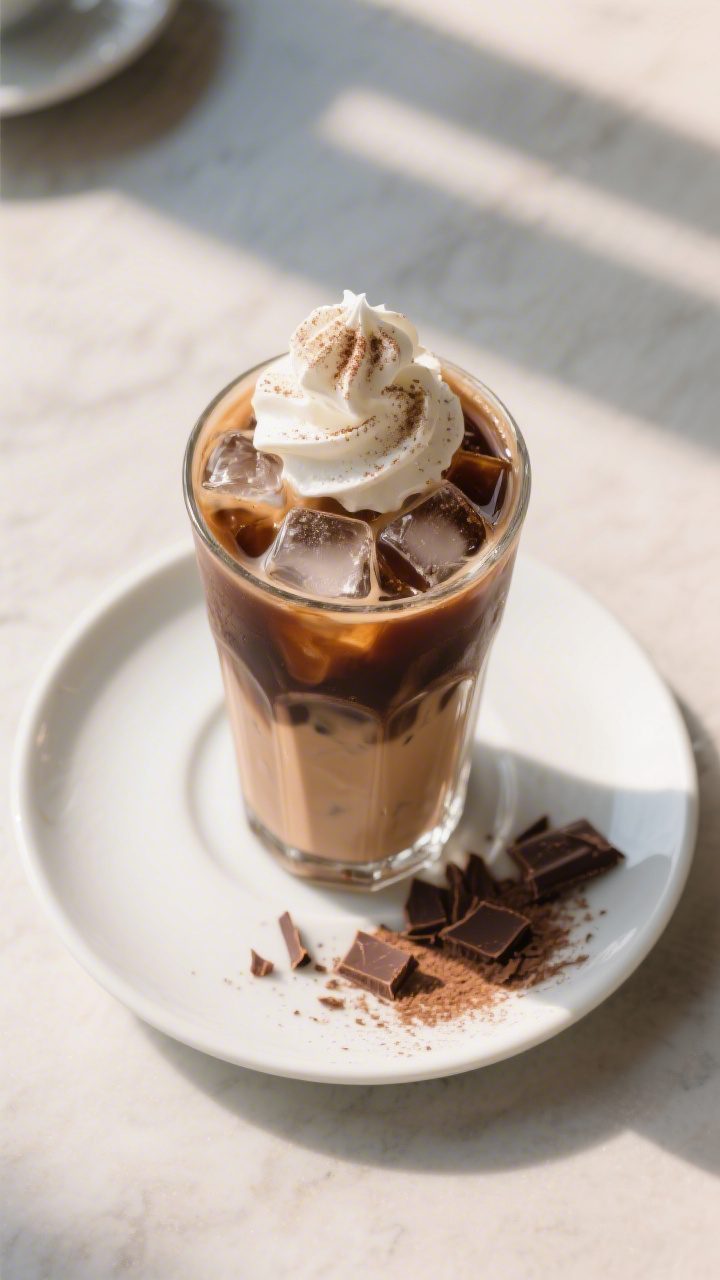
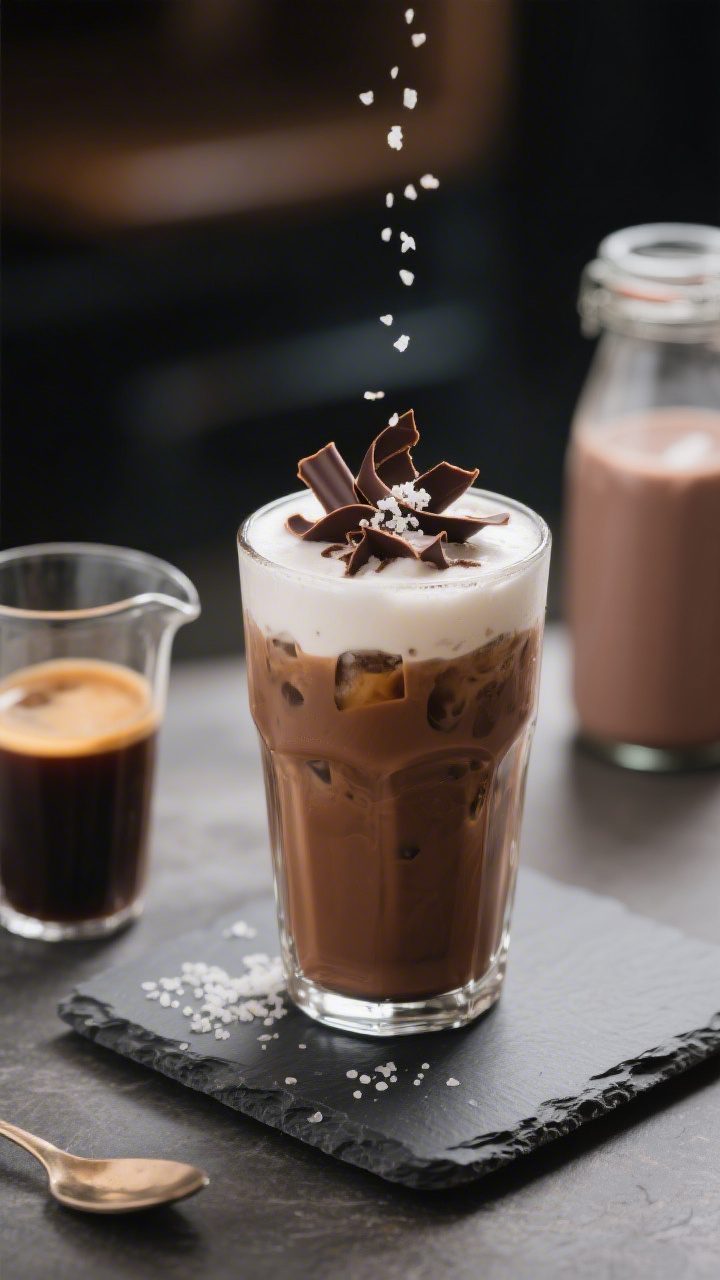
- Finish and serve: Top with whipped cream and a dusting of cocoa or chocolate shavings if you’re feeling fancy. Sip immediately.
What Makes This Recipe So Good
- No blender required: A jar with a lid and a spoon are all you need. Less cleanup, more sipping.
- Real chocolate flavor: Unsweetened cocoa powder gives a deep, authentic chocolate taste without being cloying.
- Fast: From start to first sip in about 5 minutes, especially if you have cold coffee ready.
- Customizable sweetness: Adjust sugar or swap in simple syrup, honey, or maple to taste.
- Budget-friendly: Uses pantry staples and saves you a small fortune compared to café prices.
Shopping List
- Strong brewed coffee (cold or room temperature), or cold brew concentrate diluted
- Unsweetened cocoa powder (natural or Dutch-process)
- Sugar (or simple syrup, honey, maple syrup, or agave)
- Milk (dairy or non-dairy like oat, almond, or soy)
- Vanilla extract (optional, but recommended)
- Pinch of salt (optional, enhances chocolate flavor)
- Ice cubes
- Whipped cream (optional topping)
- Chocolate shavings or cocoa dust (optional garnish)
Instructions
- Brew and cool your coffee: Make a strong batch—about double strength.
Let it cool to room temp or chill it. You’ll need roughly 3/4 to 1 cup per serving.
- Make a quick chocolate syrup: In a small bowl or mug, stir together 1 to 1.5 tablespoons unsweetened cocoa powder, 1 to 2 tablespoons sugar, and 1 tablespoon hot water. Mix until smooth and glossy.
Add a tiny pinch of salt and a few drops of vanilla if you like.
- Shake with milk: Add 1/2 cup milk to the chocolate syrup and stir until fully combined. For extra froth, pour this mixture into a jar with a tight lid and shake for 10–15 seconds.
- Combine with coffee: Fill a tall glass with ice. Pour in the cooled coffee, then add the chocolate-milk mixture.
Stir well to blend.
- Taste and adjust: Add more milk for creaminess, more coffee for strength, or a splash of simple syrup if you want it sweeter.
- Finish and serve: Top with whipped cream and a dusting of cocoa or chocolate shavings if you’re feeling fancy. Sip immediately.
How to Store
- Pre-mix base: Stir together the chocolate syrup and milk and keep it in the fridge for up to 3 days. Shake before using.
- Brew in bulk: Store strong brewed coffee or cold brew in the fridge for up to 1 week.
- Assembled drink: Best enjoyed fresh.
If you need to prep ahead, keep the coffee and chocolate-milk mixture separate and combine over ice just before serving.
Health Benefits
- Antioxidants from cocoa and coffee: Both are rich in polyphenols, which can support overall health when consumed in moderation.
- Customizable sugar: You control the sweetness, making it easier to keep added sugars in check compared to store-bought drinks.
- Dairy-free options: Use oat, almond, or soy milk for a lighter or lactose-free version while keeping the creamy texture.
- Caffeine boost: Can improve alertness and focus. Adjust coffee strength to match your needs.
Pitfalls to Watch Out For
- Gritty cocoa: Cocoa won’t dissolve well in cold liquid. Always mix cocoa with hot water first to form a smooth syrup.
- Watery flavor: If your coffee is weak or you add too much ice, the drink can taste bland.
Use strong coffee and chill it first so the ice melts slower.
- Over-sweetening: Add sweetener gradually. It’s easier to add more than to fix a sugary drink.
- Curdling with plant milks: Very acidic or hot coffee can cause separation in some non-dairy milks. Let coffee cool and choose a barista-style milk for best results.
Variations You Can Try
- Salted mocha: Add a slightly larger pinch of salt and finish with a light drizzle of caramel.
- Spiced mocha: Stir in a pinch of cinnamon and a tiny dash of cayenne or chili powder for warmth.
- Peppermint mocha: Add 1–2 drops of peppermint extract.
Go easy—peppermint is potent.
- Protein mocha: Replace part of the milk with chocolate or vanilla protein shake. Shake well to avoid clumps.
- Mocha breve: Use half-and-half instead of milk for a richer, café-style treat.
- Light and lean: Use unsweetened almond milk and a zero-calorie sweetener for a lower-calorie drink.
FAQ
Can I use instant coffee?
Yes. Dissolve 1 to 2 teaspoons of instant coffee (or to taste) in 3/4 cup hot water, then let it cool.
Instant espresso powder works even better for a stronger flavor.
What’s the best cocoa powder for this?
Both natural and Dutch-process work. Dutch-process gives a smoother, darker chocolate flavor, while natural cocoa is a bit brighter. Use what you have and adjust sweetness if needed.
How do I keep it from tasting bitter?
Use enough sweetener to balance the cocoa and coffee, and add a small pinch of salt.
If it’s still bitter, add a splash more milk or vanilla to soften the edges.
Can I make it decaf?
Absolutely. Use decaf coffee or decaf cold brew. The flavor stays rich, and you’ll still get that chocolatey satisfaction.
Do I need simple syrup?
No, but it mixes easily in cold drinks.
If using granulated sugar, dissolve it in the hot water with the cocoa to form the syrup first.
What if I don’t have vanilla?
You can skip it. A drop of almond extract or a dash of cinnamon adds nice warmth if you want a little extra something.
How can I make it extra frothy without a blender?
Shake the chocolate-milk mixture in a jar with a tight lid for 10–15 seconds before combining with coffee. You’ll get a light, café-style foam.
Can I use chocolate syrup instead of cocoa?
Yes.
Replace the cocoa-sugar-hot water mixture with 1 to 2 tablespoons of your favorite chocolate syrup, then adjust sweetness to taste.
Wrapping Up
You don’t need a blender—or a barista—to enjoy a great iced mocha. With strong coffee, a quick cocoa syrup, and a good shake, you can make a smooth, refreshing drink in minutes. Keep it simple, or dress it up with whipped cream and spices.
Once you dial in your perfect balance of coffee, milk, and sweetness, this will be your go-to iced treat at home.
Printable Recipe Card
Want just the essential recipe details without scrolling through the article? Get our printable recipe card with just the ingredients and instructions.