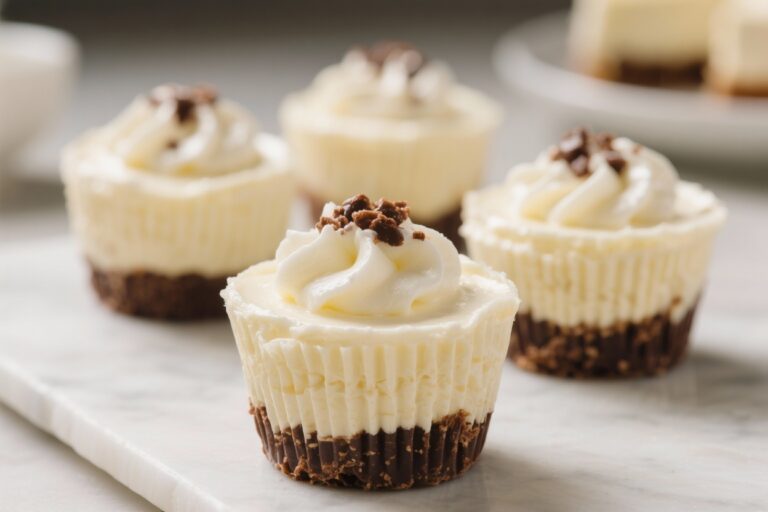
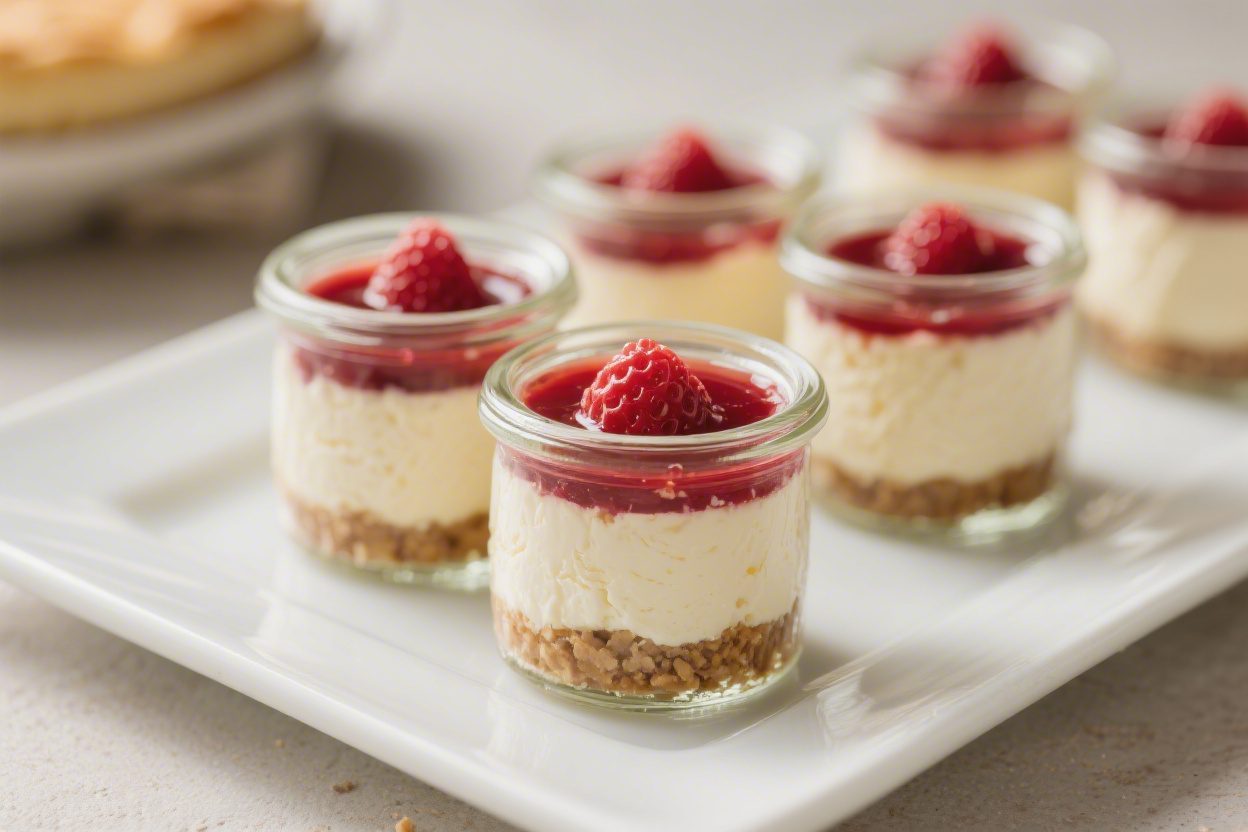
No-Bake Mini Cheesecake Jars – Creamy, Cute, and Easy
No-bake mini cheesecake jars are the kind of dessert that makes you look like you tried hard, even when you didn’t. They’re creamy, chilled, and perfectly portioned for parties, picnics, or a quick treat after dinner. No oven, no water bath, and no stress—just simple ingredients layered in a jar.
You can prep them ahead, customize the toppings, and make them look gorgeous with minimal effort. If you want a foolproof dessert that always gets compliments, this is it.
Ingredients
Method
- Prep your jars: Make sure your jars are clean and dry. Set them on a tray so you can move them all at once to the fridge.
- Make the crust: In a bowl, mix graham crumbs, melted butter, sugar, and a pinch of salt until the texture feels like wet sand and holds when pressed.
- Layer the crust: Spoon 2–3 tablespoons of crust mixture into each jar. Press down firmly with the back of a spoon or the bottom of a small glass to pack it. Chill while you make the filling.
- Whip the cream: In a cold bowl, beat the heavy cream to medium-soft peaks. It should hold shape but still look silky. Set aside.
- Beat the cream cheese: In a separate bowl, beat softened cream cheese, powdered sugar, vanilla, lemon juice, and a pinch of salt until smooth and fluffy, about 2 minutes. Scrape the bowl as needed.
- Fold it together: Gently fold the whipped cream into the cream cheese mixture in two additions. Keep it light and airy; don’t overmix.
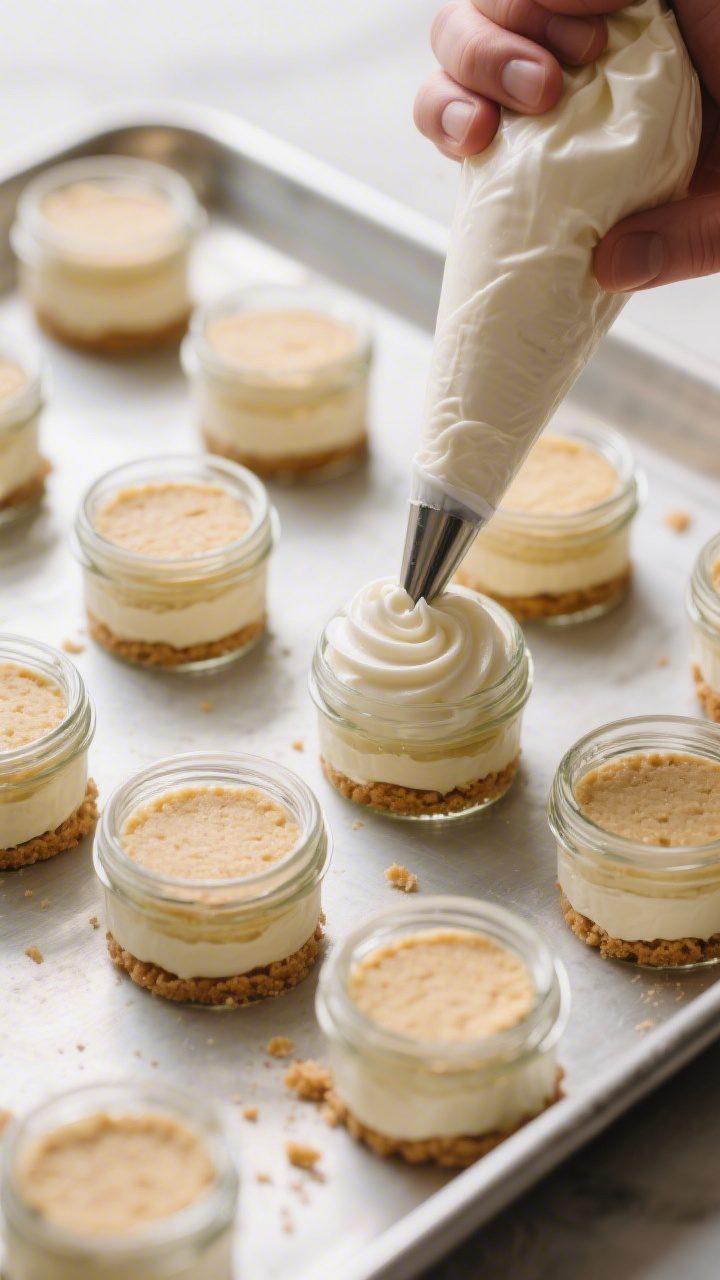
- Fill the jars: Spoon or pipe the cheesecake filling over the crusts, leaving space at the top for toppings. Smooth the surface if you like a neat look.
- Chill to set: Cover and refrigerate for at least 3 hours, ideally 6–8. Overnight is best for flavor and texture.
- Add toppings: Right before serving, add fruit, compote, sauces, or crunch. If using juicy fruit, pat it dry first so it doesn’t weep onto the cream layer.
- Serve cold: Enjoy straight from the jar with a spoon. Keep extras chilled.
What Makes This Recipe So Good
- No baking required: The filling sets in the fridge, so it’s hands-off and heat-free.
- Perfect single servings: Built-in portion control and easy to share—or save.
- Customizable: Use any cookie base and switch up toppings with fruit, chocolate, or caramel.
- Make-ahead friendly: Ideal for entertaining or meal-prepping desserts.
- Dreamy texture: Light, creamy, and tangy with a buttery cookie crunch.
What You’ll Need
- For the crust:
- 1 1/2 cups (150 g) graham cracker crumbs (or digestives/biscoff)
- 5 tablespoons (70 g) unsalted butter, melted
- 2 tablespoons granulated sugar (optional, adjust to taste)
- Pinch of fine salt
- For the cheesecake filling:
- 12 ounces (340 g) cream cheese, softened
- 1/2 cup (120 ml) heavy cream, cold
- 1/2 cup (60 g) powdered sugar
- 2 teaspoons vanilla extract
- 1 tablespoon fresh lemon juice
- Pinch of salt
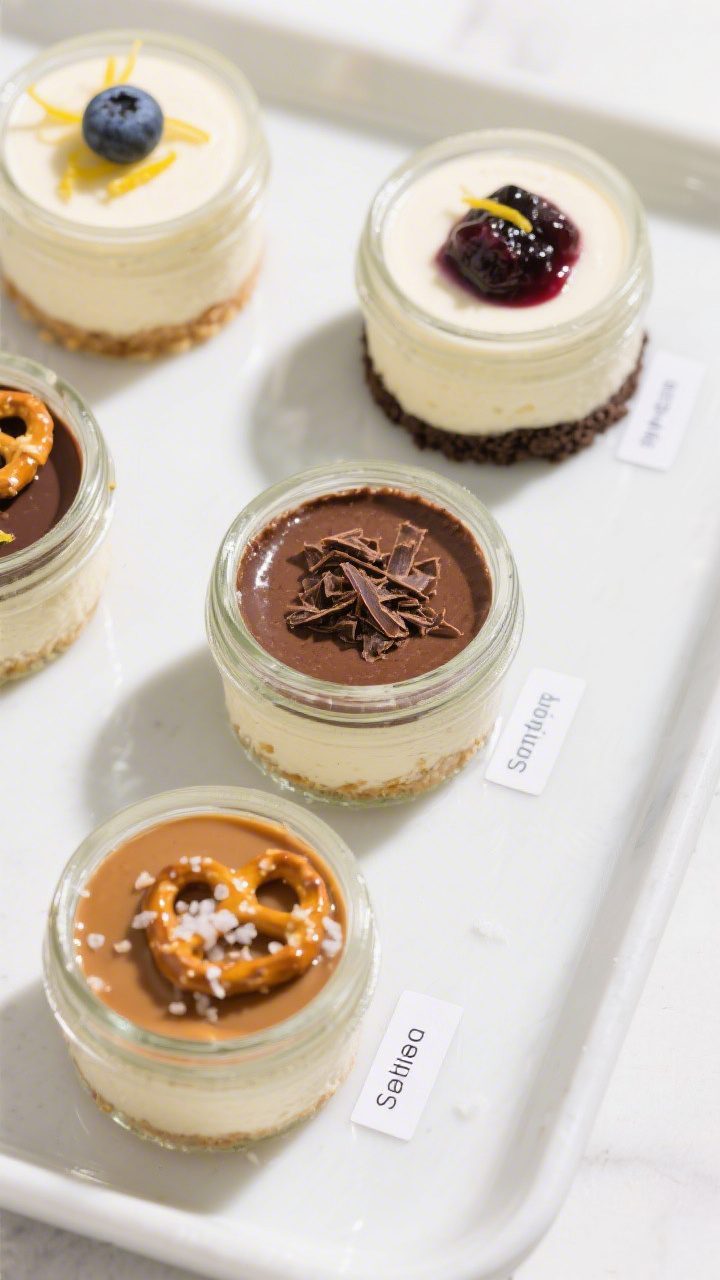
- For topping (choose one or mix):
- Fresh berries or sliced fruit
- Fruit compote or jam
- Caramel or chocolate sauce
- Lemon curd
- Crushed cookies, nuts, or shaved chocolate
- Jars: 8 to 10 small jars or ramekins (4–6 ounces each), with lids if storing
Instructions
- Prep your jars: Make sure your jars are clean and dry. Set them on a tray so you can move them all at once to the fridge.
- Make the crust: In a bowl, mix graham crumbs, melted butter, sugar, and a pinch of salt until the texture feels like wet sand and holds when pressed.
- Layer the crust: Spoon 2–3 tablespoons of crust mixture into each jar.
Press down firmly with the back of a spoon or the bottom of a small glass to pack it. Chill while you make the filling.
- Whip the cream: In a cold bowl, beat the heavy cream to medium-soft peaks. It should hold shape but still look silky.
Set aside.
- Beat the cream cheese: In a separate bowl, beat softened cream cheese, powdered sugar, vanilla, lemon juice, and a pinch of salt until smooth and fluffy, about 2 minutes. Scrape the bowl as needed.
- Fold it together: Gently fold the whipped cream into the cream cheese mixture in two additions. Keep it light and airy; don’t overmix.
- Fill the jars: Spoon or pipe the cheesecake filling over the crusts, leaving space at the top for toppings.
Smooth the surface if you like a neat look.
- Chill to set: Cover and refrigerate for at least 3 hours, ideally 6–8. Overnight is best for flavor and texture.
- Add toppings: Right before serving, add fruit, compote, sauces, or crunch. If using juicy fruit, pat it dry first so it doesn’t weep onto the cream layer.
- Serve cold: Enjoy straight from the jar with a spoon.
Keep extras chilled.
Keeping It Fresh
- Refrigeration: Store covered jars in the fridge for up to 4 days. Add wet toppings within 24 hours of serving for best texture.
- Freezing: You can freeze the assembled jars (without fresh fruit) for up to 1 month. Thaw in the fridge overnight.
The texture stays creamy, though slightly firmer.
- Transport tips: Keep them in a cooler with ice packs. Pack toppings separately and add on-site for the cleanest look.
Health Benefits
- Built-in portion control: Individual jars help you enjoy dessert without overdoing it.
- Protein and calcium: Cream cheese provides both, which can help keep you satisfied.
- Fresh fruit option: Topping with berries or citrus adds fiber, vitamins, and natural sweetness.
- Adjustable sweetness: You control the sugar level in both crust and filling, making it easy to lighten up.
Common Mistakes to Avoid
- Using cold cream cheese: It won’t blend smoothly and can leave lumps. Let it soften at room temp for 30–45 minutes.
- Overmixing the filling: This deflates the whipped cream and makes the filling dense.
Fold gently.
- Adding wet toppings too early: Fruit juices can bleed into the cream. Add right before serving or pat fruit dry.
- Skipping the chill time: The filling needs time to set. Rushing this leads to a loose, messy texture.
- Crust too crumbly: Not enough butter or not pressing firmly causes a loose base.
It should compress and hold together.
Recipe Variations
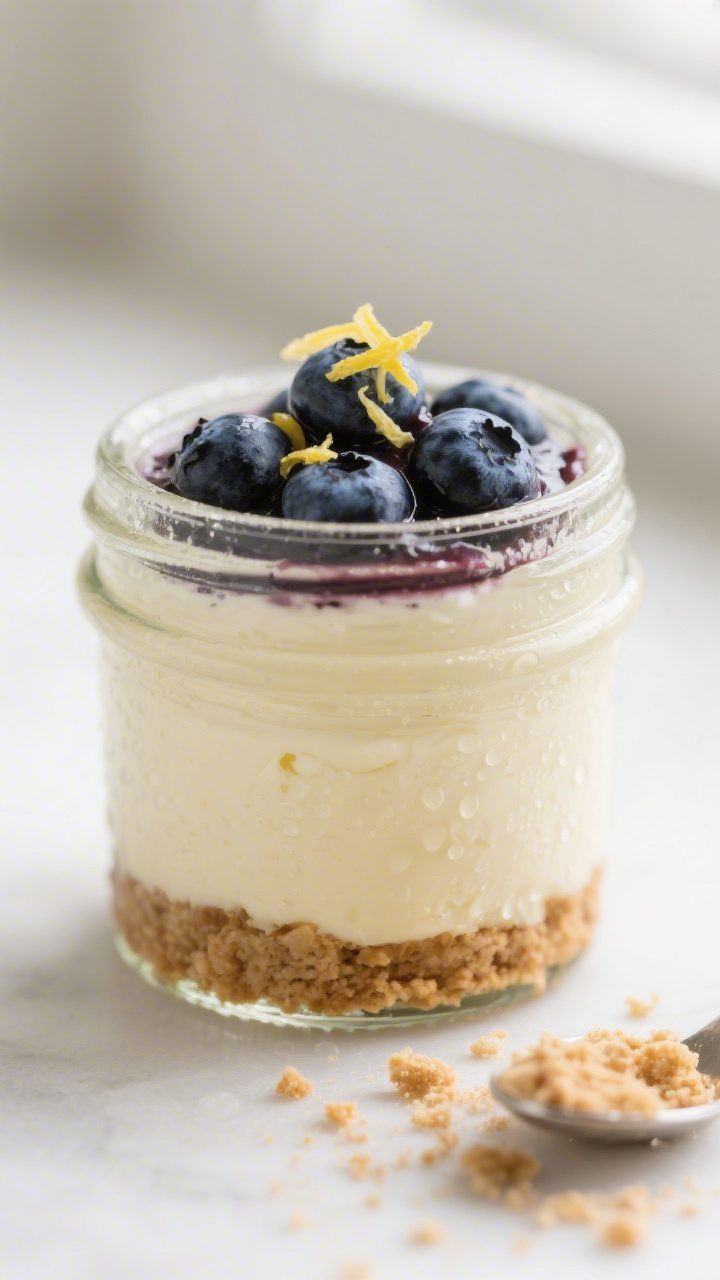
- Lemon Blueberry: Add 1–2 teaspoons lemon zest to the filling. Top with blueberry compote and a twist of lemon zest.
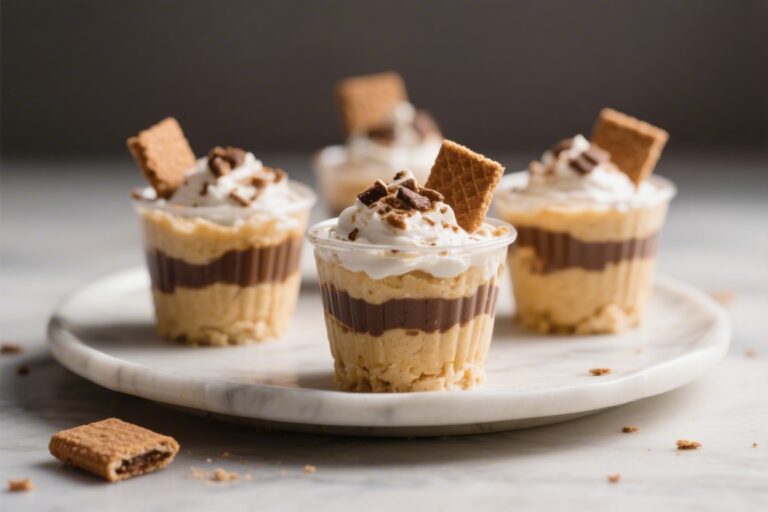
- Chocolate Lovers: Mix 2 tablespoons cocoa powder into the filling and use crushed chocolate cookies for the crust. Finish with chocolate shavings.
- Salted Caramel Pretzel: Swap half the graham crumbs for crushed pretzels.
Top with caramel sauce and a tiny pinch of flaky salt.
- Strawberry Shortcake: Use shortbread or vanilla wafer crumbs. Add sliced strawberries and a dollop of whipped cream on top.
- Spiced Chai: Add 1/2 teaspoon ground cinnamon and 1/4 teaspoon each of cardamom and ginger to the filling. Use Biscoff cookies for the crust.
- Tropical: Stir a tablespoon of coconut cream into the filling and top with mango and toasted coconut flakes.
- Lightened-Up: Use reduced-fat cream cheese and swap half the heavy cream for Greek yogurt.
Chill well for best set.
FAQ
Can I make these a day ahead?
Yes. In fact, they taste even better the next day because the flavors meld and the filling firms up. Add toppings right before serving.
What if I don’t have a mixer?
You can use a sturdy whisk.
Soften the cream cheese well, whisk the cream separately until thick, and fold gently. It takes more elbow grease but works.
Can I use a sugar substitute?
Yes, powdered-style sugar substitutes designed for baking work best. Taste as you go, since some sweeteners are stronger than sugar.
What jars should I use?
Small mason jars, Weck jars, or any 4–6 ounce containers with straight sides are ideal.
Ramekins also work if you don’t need lids.
Why is my filling runny?
Common reasons include under-whipped cream, warm kitchen, or not chilling long enough. Make sure the cream is whipped to soft-medium peaks and chill at least 3 hours.
Can I make them gluten-free?
Absolutely. Use gluten-free cookies for the crust and check that your toppings are gluten-free.
The filling is naturally gluten-free.
Can I double the recipe?
Yes. Double all ingredients and use a larger mixing bowl. Work in batches if needed to avoid overmixing.
How do I get super smooth filling?
Beat the softened cream cheese until creamy before adding other ingredients, and sift the powdered sugar.
Scrape the bowl often to avoid lumps.
In Conclusion
No-bake mini cheesecake jars are a simple, crowd-pleasing dessert with a creamy center and a crunchy base. They’re easy to prep, easy to customize, and easy to love. Keep a batch in the fridge for weeknight treats or dress them up for a special occasion.
With a few basic ingredients and a little chill time, you’ve got a dessert that looks polished and tastes like a classic.
Printable Recipe Card
Want just the essential recipe details without scrolling through the article? Get our printable recipe card with just the ingredients and instructions.