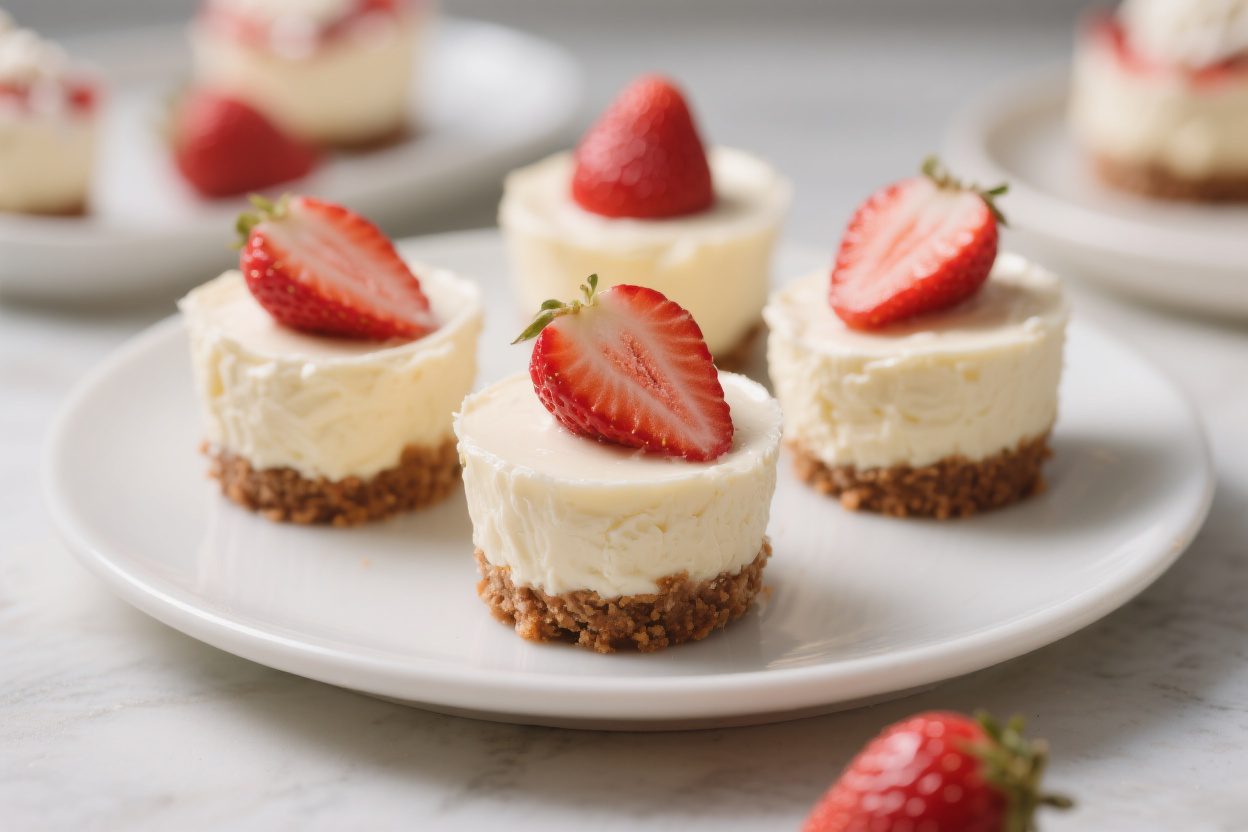
No-Bake Strawberry Cheesecake Cups – Creamy, Fresh, and Effortless
These cheesecake cups are the kind of dessert that makes you look like you tried hard, even when you didn’t. They’re creamy, lightly sweet, and layered with bright strawberry flavor. No oven, no water bath, no stress—just simple steps and a handful of ingredients.
Perfect for a quick dessert, a make-ahead treat for guests, or an easy win on a weeknight. If you love cheesecake but hate the wait, these cups are your new go-to.
Ingredients
Method
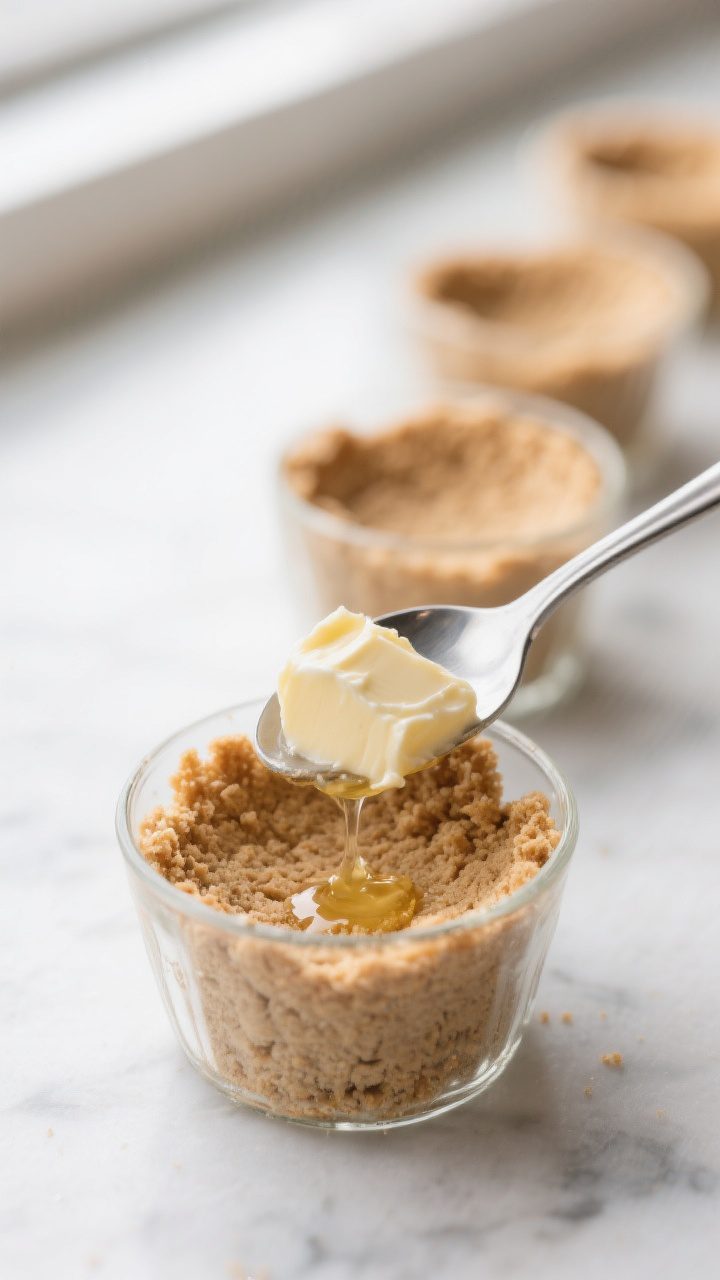
- Make the crust: In a bowl, mix graham cracker crumbs, melted butter, and 2 tablespoons sugar until the texture feels like damp sand. It should clump slightly when pressed.
- Assemble the base: Spoon a couple of tablespoons of the crumb mixture into each cup. Press it down gently with the back of a spoon or your fingers. Set aside while you make the filling.
- Prep the strawberries: Slice the strawberries. If using jam, stir it to loosen. You can also toss the strawberries with a teaspoon of sugar and a squeeze of lemon juice if they’re not very sweet.
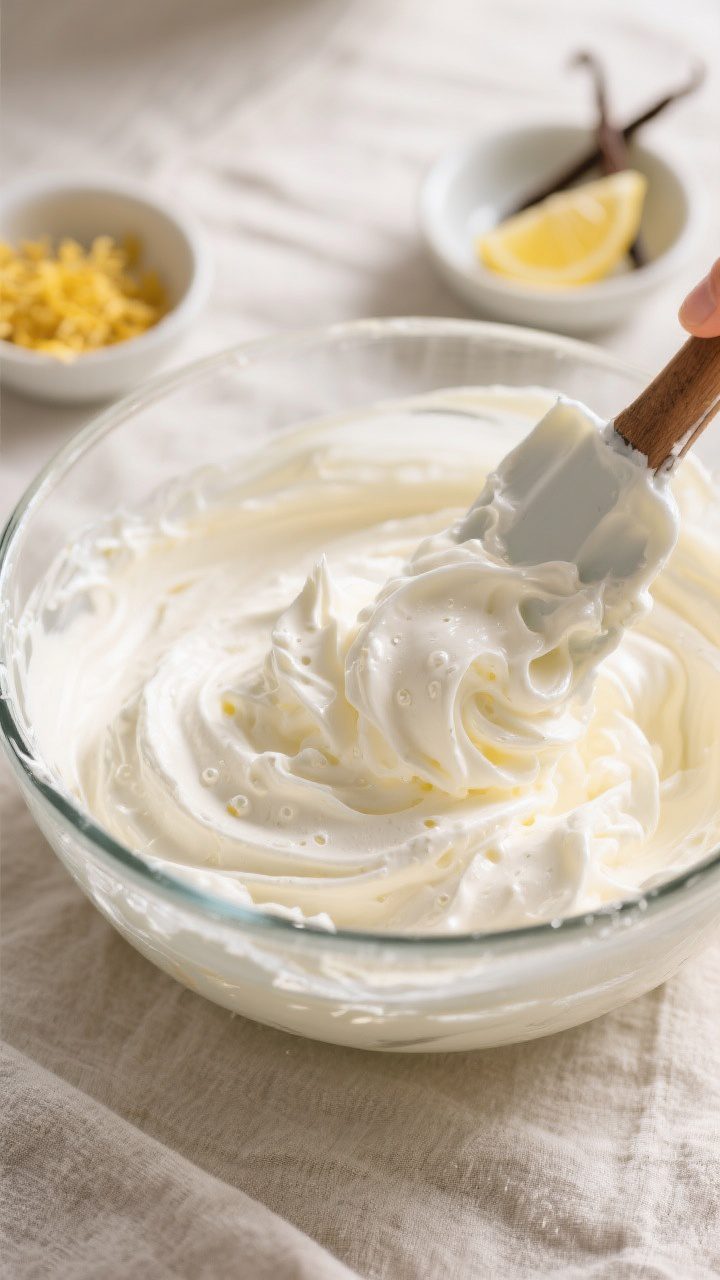
- Whip the cream: In a cold bowl, whip the heavy cream to medium-stiff peaks. Don’t overbeat—stop when it holds shape but still looks smooth and glossy. Set aside.
- Make the cheesecake filling: In another bowl, beat the softened cream cheese with powdered sugar, vanilla, lemon zest, lemon juice, and a pinch of salt until smooth and fluffy. Scrape down the bowl to avoid lumps.
- Fold in the whipped cream: Gently fold the whipped cream into the cream cheese mixture in two additions. Use a spatula and light strokes to keep the mixture airy.
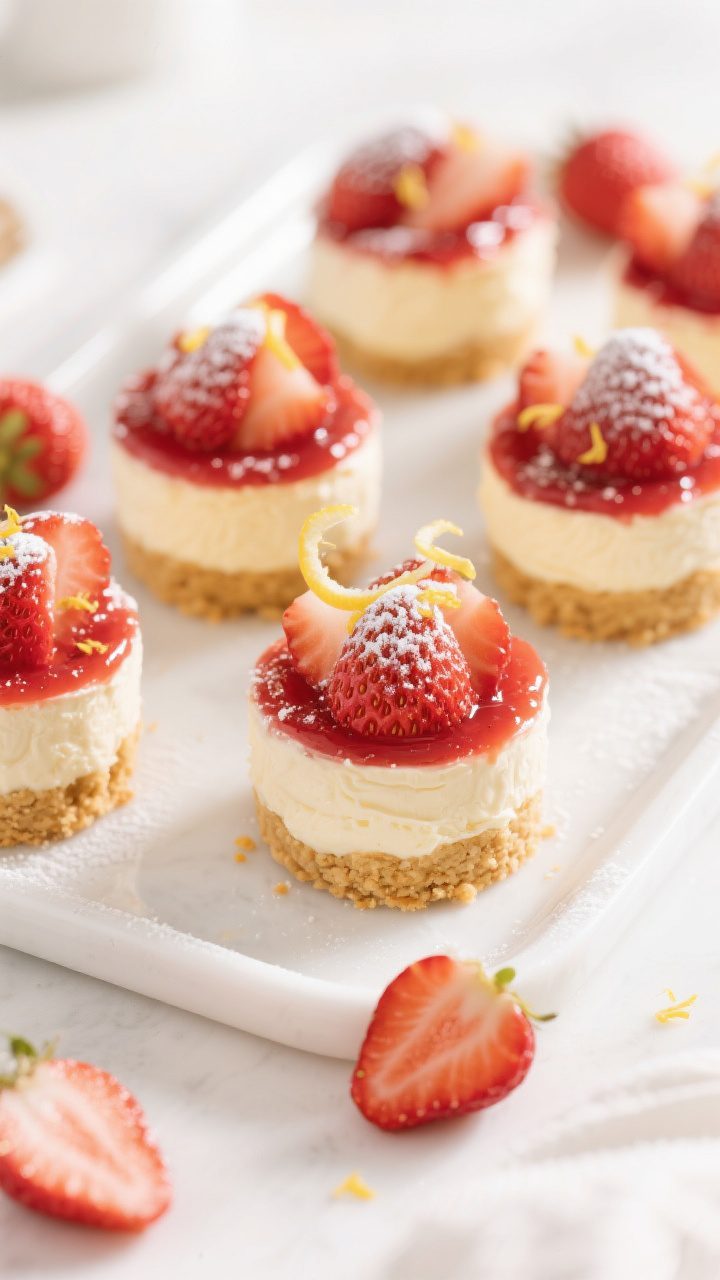
- Layer the cups: Add a layer of cheesecake filling on top of the crust. Spoon on a little strawberry jam (if using), then add a layer of strawberries. Top with more cheesecake filling. Finish with extra strawberries on top.
- Chill: Cover the cups and refrigerate for at least 2 hours, or up to 24 hours. This helps the crust set and the flavors meld.
- Serve: Right before serving, add a final spoon of strawberries, a light dusting of powdered sugar, or a drizzle of melted chocolate if you like.
What Makes This Special
These cups bring together the best parts of cheesecake without any baking. The texture is silky and light, thanks to a mix of cream cheese and whipped cream.
The strawberries add a fresh pop of flavor that balances the richness. Plus, everything is portioned into cups, so serving is effortless and cleanup is minimal.
You can also customize each cup—extra strawberries for some, chocolate drizzle for others, or a graham-free base for gluten-free guests. It’s a crowd-pleaser that’s ready in minutes and sets up beautifully in the fridge.
What You’ll Need
- Graham cracker crumbs (about 1 1/2 cups) or digestive biscuit crumbs
- Unsalted butter, melted (6 tablespoons)
- Granulated sugar (2 tablespoons for the crust)
- Cream cheese, softened (16 ounces)
- Powdered sugar (1/2 cup, adjust to taste)
- Pure vanilla extract (1 teaspoon)
- Lemon zest (optional, 1/2 teaspoon) and lemon juice (1 teaspoon) for brightness
- Heavy whipping cream (1 cup), cold
- Fresh strawberries (2 to 3 cups), hulled and sliced
- Strawberry jam or preserves (1/3 cup), optional for extra flavor
- Pinch of salt to balance sweetness
- Serving cups (8 to 10 small jars, ramekins, or clear cups)
Step-by-Step Instructions
- Make the crust: In a bowl, mix graham cracker crumbs, melted butter, and 2 tablespoons sugar until the texture feels like damp sand.
It should clump slightly when pressed.
- Assemble the base: Spoon a couple of tablespoons of the crumb mixture into each cup. Press it down gently with the back of a spoon or your fingers. Set aside while you make the filling.
- Prep the strawberries: Slice the strawberries.
If using jam, stir it to loosen. You can also toss the strawberries with a teaspoon of sugar and a squeeze of lemon juice if they’re not very sweet.
- Whip the cream: In a cold bowl, whip the heavy cream to medium-stiff peaks. Don’t overbeat—stop when it holds shape but still looks smooth and glossy.
Set aside.
- Make the cheesecake filling: In another bowl, beat the softened cream cheese with powdered sugar, vanilla, lemon zest, lemon juice, and a pinch of salt until smooth and fluffy. Scrape down the bowl to avoid lumps.
- Fold in the whipped cream: Gently fold the whipped cream into the cream cheese mixture in two additions. Use a spatula and light strokes to keep the mixture airy.
- Layer the cups: Add a layer of cheesecake filling on top of the crust.
Spoon on a little strawberry jam (if using), then add a layer of strawberries. Top with more cheesecake filling. Finish with extra strawberries on top.
- Chill: Cover the cups and refrigerate for at least 2 hours, or up to 24 hours.
This helps the crust set and the flavors meld.
- Serve: Right before serving, add a final spoon of strawberries, a light dusting of powdered sugar, or a drizzle of melted chocolate if you like.
Storage Instructions
- Refrigerate: Keep covered in the fridge for up to 3 days. The texture stays creamy and the flavors deepen over time.
- Strawberry topping: For the best look, add fresh strawberries the day you serve. If using jam, it holds up well for all 3 days.
- Do not freeze: Freezing can cause the filling to separate and the strawberries to weep once thawed.
Why This is Good for You
Fresh strawberries bring vitamin C, fiber, and antioxidants to the party.
Using real fruit keeps the dessert bright and not overly sweet. The no-bake method also means less fuss and more control—you decide how much sugar to add and what goes into each cup.
If you want to lighten it up further, you can use a bit less sugar, swap in Greek yogurt for part of the cream cheese, or choose a thinner layer of crust. It’s dessert, but it doesn’t have to be heavy.
What Not to Do
- Don’t rush the chill time. The filling needs at least a couple of hours to set properly.
- Don’t use warm cream. Warm cream won’t whip well.
Keep it cold and use a chilled bowl if possible.
- Don’t skip softening the cream cheese. Cold blocks cause lumps that won’t blend out easily.
- Don’t over-sweeten the berries. Too much sugar draws out water and makes the topping runny.
- Don’t crush the crust too hard. Overpacking makes it tough; a light press keeps it tender.
Alternatives
- Crust swaps: Try Oreos (no extra sugar needed), Biscoff cookies, or almond meal for a gluten-free option.
- Dairy modifications: Use lactose-free cream cheese and whipping cream, or sub part of the cream cheese with thick Greek yogurt for a tangier, lighter filling.
- Fruit variations: Blueberries, raspberries, or a mixed-berry compote all work well. Mango is great in summer.
- Sweetener choices: Use honey or maple syrup in the filling—start with 1/3 cup and adjust to taste.
- Flavor boosters: Add a splash of almond extract, a swirl of lemon curd, or a thin layer of chocolate ganache over the crust.
- Protein bump: Fold in 2 to 3 tablespoons of unflavored or vanilla whey to the filling; add a touch more cream if it gets too thick.
FAQ
Can I make these a day ahead?
Yes. They’re actually better the next day because the flavors meld and the crust sets nicely.
Just add the fresh strawberries on top right before serving for the best texture.
Do I need a stabilizer for the whipped cream?
No, not for short-term storage. Whipping to medium-stiff peaks and chilling the cups is enough. If you want extra stability for warm rooms or longer events, add 1 tablespoon of instant pudding mix or 1 teaspoon of gelatin (bloomed and cooled) to the filling.
What if I don’t have an electric mixer?
You can still make it.
Beat the cream cheese vigorously with a sturdy whisk until smooth, and whip the cold cream by hand. It takes more elbow grease, but it works.
Can I reduce the sugar?
Absolutely. Start with 1/3 cup powdered sugar in the filling, taste, and adjust.
The sweetness from ripe strawberries and a little jam usually goes a long way.
How do I keep the strawberries from getting watery?
Use firm, ripe berries and slice them just before assembling. If your berries are very juicy, skip any extra sugar and pat them dry with a paper towel before layering.
What size cups should I use?
Four to eight-ounce cups work best. Smaller cups are great for parties; larger ones feel more indulgent and can hold prettier layers.
Can I make a single big batch instead of cups?
Yes.
Press the crust into an 8×8-inch dish, layer the filling and strawberries, and chill. Slice into squares to serve.
Is there a vegan option?
Use dairy-free cream cheese and coconut whipping cream. Sweeten with powdered sugar or maple syrup.
Make the crust with vegan cookies and plant-based butter.
In Conclusion
No-Bake Strawberry Cheesecake Cups are simple, fresh, and flexible. They deliver classic cheesecake flavor with a light, creamy texture and bright fruit on top. Make them ahead, serve them chilled, and enjoy a dessert that looks polished without the stress.
Once you try them, you’ll keep the ingredients on hand for whenever a sweet craving strikes.
Printable Recipe Card
Want just the essential recipe details without scrolling through the article? Get our printable recipe card with just the ingredients and instructions.