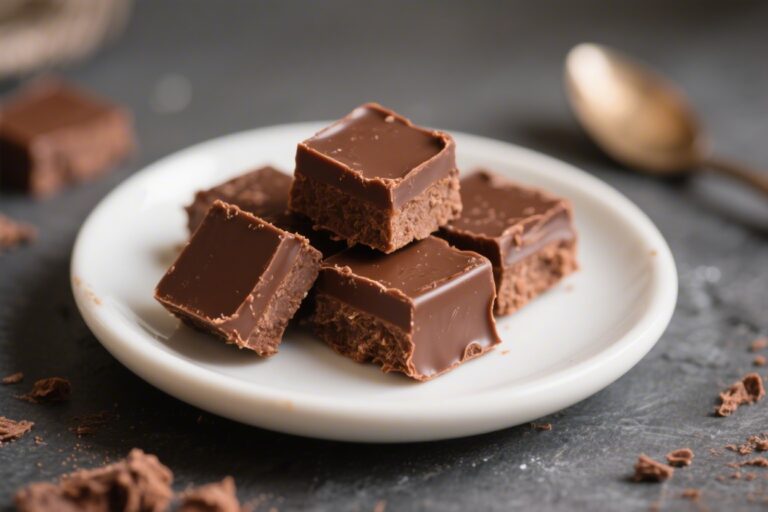
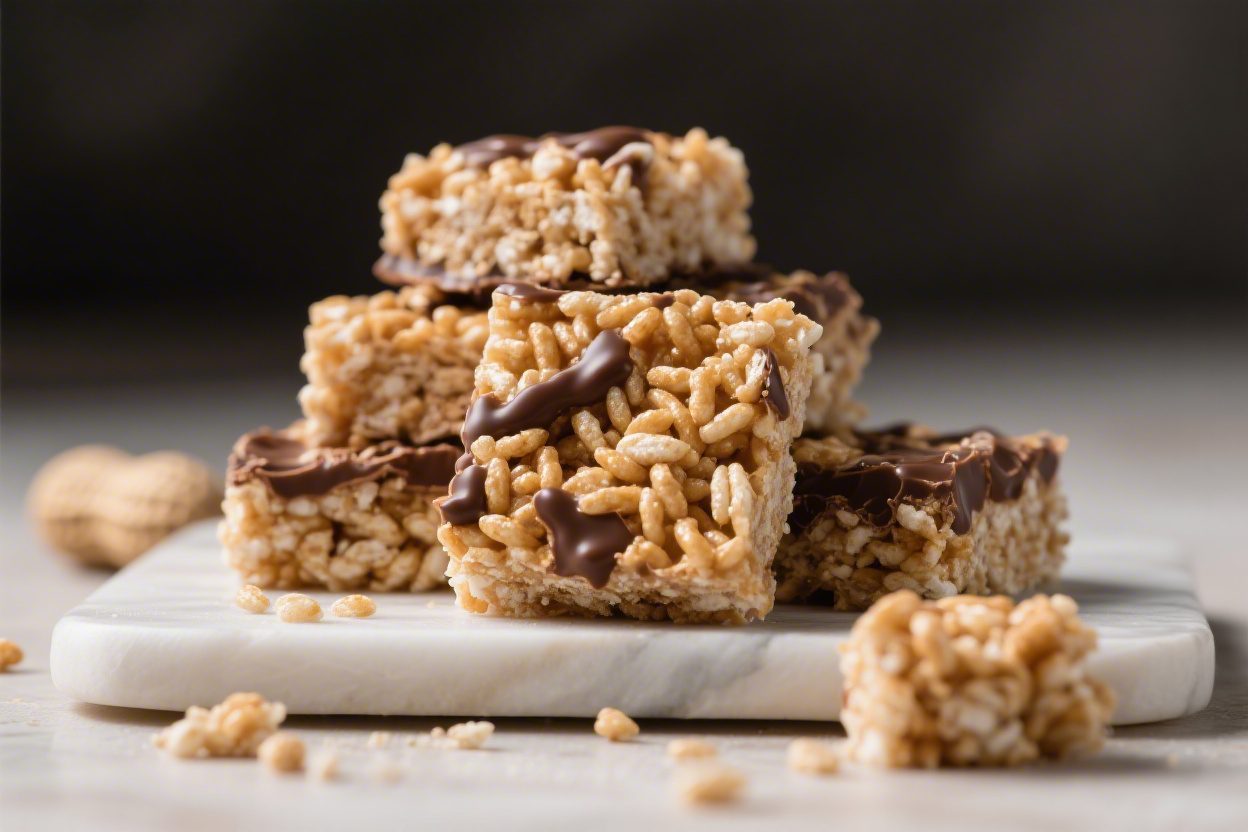
Peanut Butter Chocolate Rice Krispie Treats – A No-Bake Classic With a Creamy, Crunchy Twist
Peanut Butter Chocolate Rice Krispie Treats hit that sweet spot between nostalgic and downright irresistible. They’re quick to make, no baking required, and they deliver a perfect mix of chewy, crispy, and melty. If you need a foolproof dessert for a party, a lunchbox, or a late-night craving, this is it.
The peanut butter adds richness without making them heavy, while the chocolate brings everything together. Expect big smiles and sticky fingers.
Peanut Butter Chocolate Rice Krispie Treats - A No-Bake Classic With a Creamy, Crunchy Twist
Ingredients
Method
- Prep the pan. Line a 9x13-inch baking pan with parchment, leaving overhang for easy lifting. Lightly grease the parchment so nothing sticks.
- Melt the butter. In a large pot over low heat, melt the butter gently. Keep the heat low to avoid scorching.
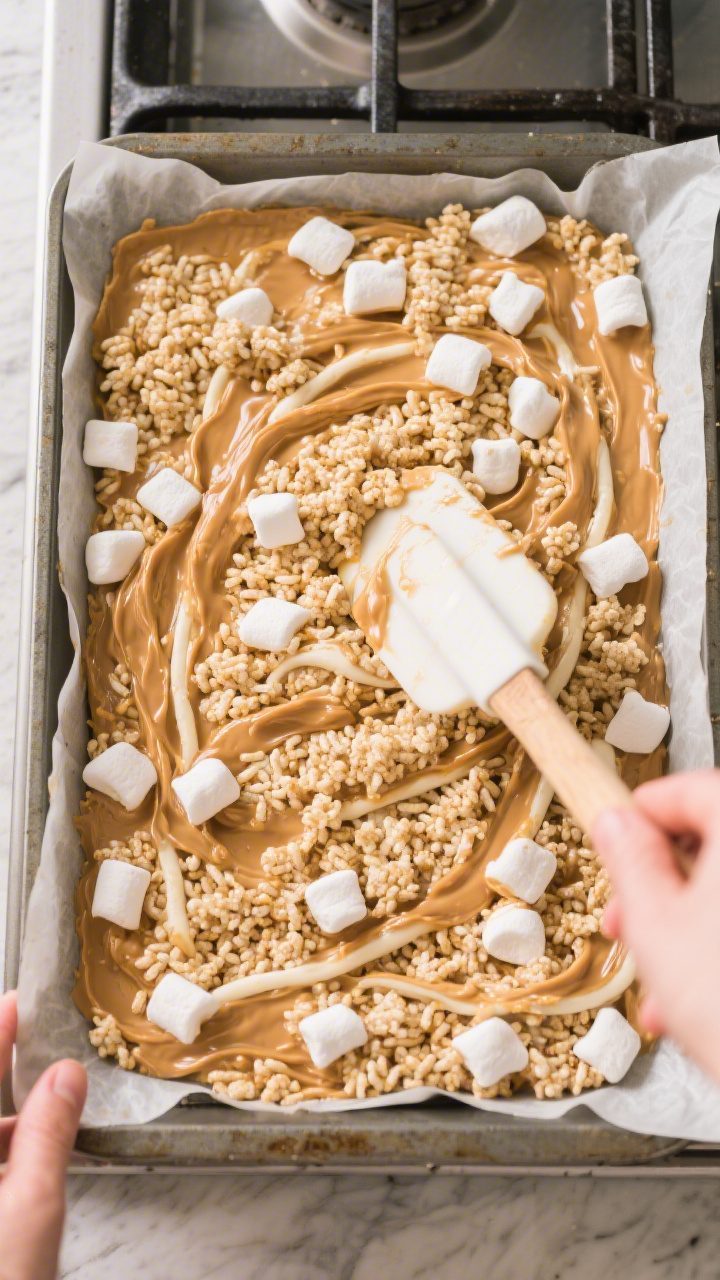
- Add marshmallows. Stir in the mini marshmallows and cook on low, stirring constantly, until fully melted and smooth. If using extra marshmallows for pockets of goo, hold them back for now.
- Stir in peanut butter, vanilla, and salt. Remove the pot from heat. Quickly stir in the peanut butter, vanilla extract, and salt until smooth and combined.
- Fold in cereal. Add the Rice Krispies. Using a greased spatula, fold gently until the cereal is evenly coated. If you reserved extra marshmallows, fold them in now for soft bites throughout.
- Press into the pan. Transfer the mixture to the prepared pan. Lightly grease your hands or a spatula and press evenly. Don’t compact it too hard—gentle pressure keeps the bars tender.
- Make the chocolate topping. In a microwave-safe bowl, heat the chocolate chips with the coconut oil in 20–30 second bursts, stirring between each, until smooth. Or melt over a double boiler on the stove.
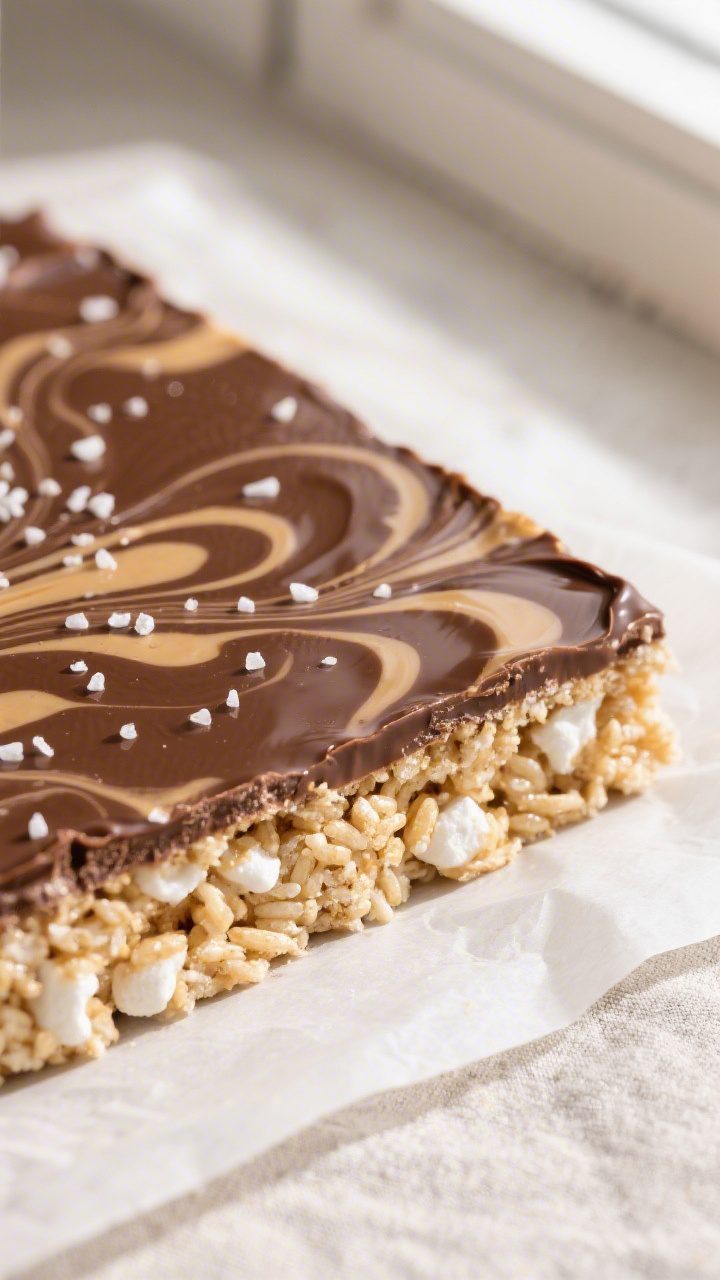
- Top and set. Pour the melted chocolate over the bars and spread evenly. Sprinkle with flaky sea salt if using. Let the bars set at room temperature for about 1 hour, or chill for 20–30 minutes until the chocolate firms up.
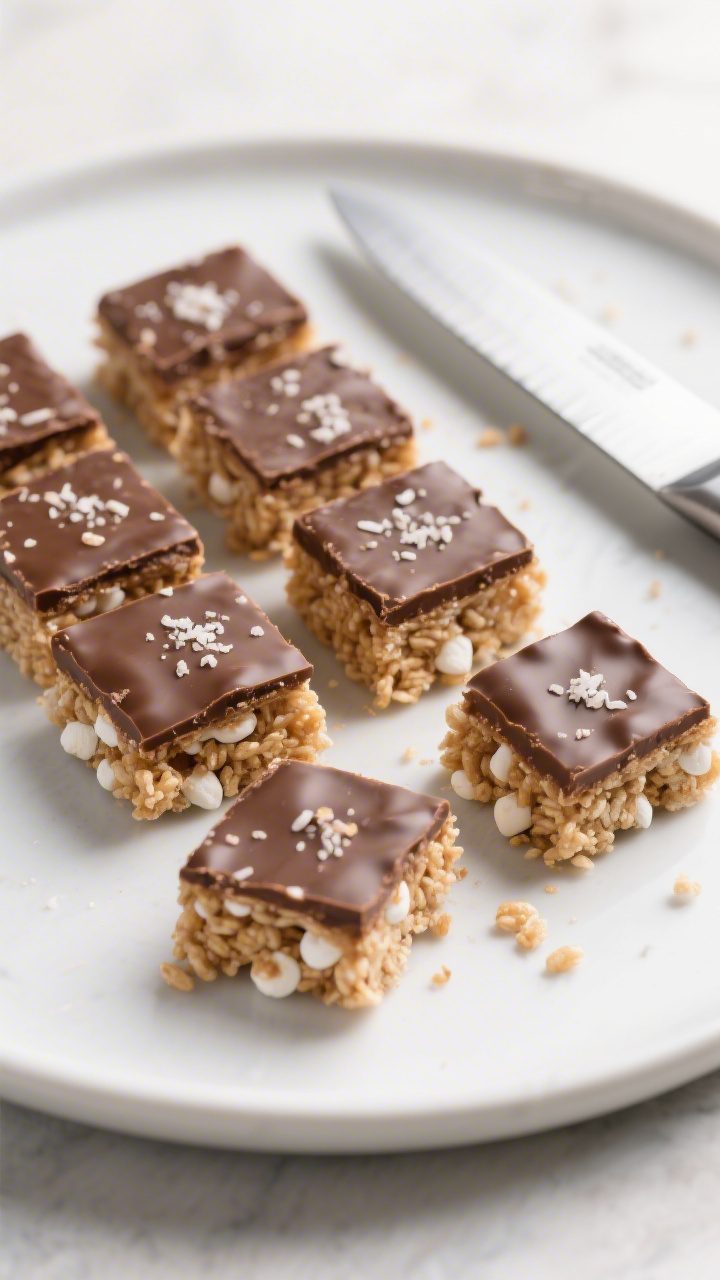
- Slice and serve. Lift the slab out using the parchment and cut into squares with a sharp knife. Wipe the knife between cuts for clean edges.
What Makes This Special
These aren’t your standard cereal bars. A layer of silky chocolate on top turns a childhood favorite into a crowd-pleaser for all ages.
The recipe is simple, but the texture is spot on—light crunch from the cereal, soft chew from the marshmallows, and a creamy peanut butter backbone.
They’re also flexible. You can make them in under 30 minutes, switch up the nut butter, or add mix-ins like pretzels or chopped peanuts. And because they’re sturdy yet soft, they slice beautifully and travel well.
Ingredients
- 6 cups Rice Krispies or puffed rice cereal
- 4 tablespoons unsalted butter
- 1 (10-ounce) bag mini marshmallows (about 5–6 cups), plus an extra handful if you like pockets of goo
- 1/2 cup creamy peanut butter (not natural with separated oil, if possible)
- 1 teaspoon vanilla extract
- 1/4 teaspoon fine sea salt (skip if using salted butter)
- 1 1/2 cups semi-sweet chocolate chips (or milk chocolate if you prefer sweeter)
- 1 tablespoon coconut oil or neutral oil (optional, for a smoother chocolate topping)
- Flaky sea salt for sprinkling (optional but recommended)
Instructions
- Prep the pan. Line a 9×13-inch baking pan with parchment, leaving overhang for easy lifting.
Lightly grease the parchment so nothing sticks.
- Melt the butter. In a large pot over low heat, melt the butter gently. Keep the heat low to avoid scorching.
- Add marshmallows. Stir in the mini marshmallows and cook on low, stirring constantly, until fully melted and smooth. If using extra marshmallows for pockets of goo, hold them back for now.
- Stir in peanut butter, vanilla, and salt. Remove the pot from heat.
Quickly stir in the peanut butter, vanilla extract, and salt until smooth and combined.
- Fold in cereal. Add the Rice Krispies. Using a greased spatula, fold gently until the cereal is evenly coated. If you reserved extra marshmallows, fold them in now for soft bites throughout.
- Press into the pan. Transfer the mixture to the prepared pan.
Lightly grease your hands or a spatula and press evenly. Don’t compact it too hard—gentle pressure keeps the bars tender.
- Make the chocolate topping. In a microwave-safe bowl, heat the chocolate chips with the coconut oil in 20–30 second bursts, stirring between each, until smooth. Or melt over a double boiler on the stove.
- Top and set. Pour the melted chocolate over the bars and spread evenly.
Sprinkle with flaky sea salt if using. Let the bars set at room temperature for about 1 hour, or chill for 20–30 minutes until the chocolate firms up.
- Slice and serve. Lift the slab out using the parchment and cut into squares with a sharp knife. Wipe the knife between cuts for clean edges.
Storage Instructions
- Room temperature: Store in an airtight container for 3–4 days.
Keep them in a cool spot to prevent the chocolate from getting too soft.
- Refrigerator: Keeps for up to a week. The bars will be a bit firmer; let them sit at room temp for 10 minutes before serving.
- Freezer: Wrap bars individually and freeze in a zip-top bag for up to 2 months. Thaw at room temperature for 20–30 minutes.
Why This is Good for You
These treats are still dessert, but there are a few upsides. Peanut butter adds protein and healthy fats, which help make each square more satisfying.
Because the recipe is no-bake, you keep things simple and avoid extra oils or crusts.
You can also tweak the sweetness. Using semi-sweet chocolate balances the sugar from the marshmallows, and a sprinkle of flaky sea salt sharpens the flavors so you’re happy with a smaller piece. Small changes, big impact.
Common Mistakes to Avoid
- Overheating the marshmallows: High heat turns them tough and sticky.
Keep it low and stir constantly.
- Packing the mixture too tightly: Press gently so the bars stay soft and chewy instead of dense.
- Using natural peanut butter with separated oil: It can make the bars greasy and cause the topping to slide. If you love natural PB, use a well-stirred, no-stir variety.
- Adding cereal too soon: If the mixture is scorching hot, the cereal can turn soggy. Remove from heat first, then work quickly.
- Skipping salt: A pinch of salt makes the peanut butter and chocolate pop.
Even a tiny amount helps.
- Cutting while warm: Let the chocolate set; otherwise, you’ll get smears and uneven edges.
Alternatives
- Nut-free: Swap peanut butter for sunflower seed butter or tahini. Taste and add an extra pinch of salt and a drizzle of honey if needed to balance.
- Gluten-free: Use certified gluten-free crisp rice cereal. Many mainstream brands are not certified.
- Darker chocolate: For a less sweet bar, use 60–70% dark chocolate.
It pairs beautifully with the peanut flavor.
- Mix-ins: Fold in 1/2 cup chopped roasted peanuts, mini peanut butter cups, or crushed pretzels for added crunch and contrast.
- Marbled topping: Melt 1/4 cup peanut butter and drizzle over the chocolate. Swirl with a toothpick for a pretty finish.
- Vegan: Use vegan marshmallows, plant-based butter, and dairy-free chocolate. Check labels to ensure they melt well.
FAQ
Can I make these without marshmallows?
Yes.
Use a 1:1 mix of honey and peanut butter (about 3/4 cup total for 6 cups cereal) warmed with the butter until smooth. The texture will be denser and less chewy, but still delicious.
How do I keep the treats from sticking to my hands and spatula?
Lightly grease your hands and tools with butter or a neutral oil. You can also use a piece of parchment to press the mixture without touching it directly.
What size pan should I use if I want thicker bars?
Use an 8×8- or 9×9-inch pan for extra-thick squares.
They’ll need a bit more time to set, and you may prefer to cut them smaller.
Why did my bars turn hard?
They were likely heated too hot or packed too firmly. Keep the heat low when melting marshmallows, and press the mixture into the pan with a light hand.
Can I make these ahead for a party?
Absolutely. Make them a day in advance, keep them covered at room temperature, and slice just before serving.
If your kitchen runs warm, chill briefly to set the chocolate, then bring to room temp.
What kind of peanut butter works best?
Creamy, no-stir peanut butter gives the most consistent results. If you prefer natural, make sure it’s very well mixed and not overly runny.
How do I cut clean squares without cracking the chocolate?
Let the bars come to room temperature if chilled. Use a sharp chef’s knife warmed under hot water and wiped dry between cuts.
Can I reduce the sweetness?
Use dark chocolate and add a pinch more salt.
You can also reduce the marshmallows to 8 ounces for a slightly less sweet base, though the bars will be a touch firmer.
Wrapping Up
Peanut Butter Chocolate Rice Krispie Treats are the kind of dessert that never disappoints—easy to make, easy to love, and perfect for sharing. With a short ingredient list and minimal effort, you get a pan of balanced, craveable bars that taste like a hug. Keep this recipe handy for bake sales, birthdays, or any time you want something sweet without fuss.
Once you make them, they’ll be a regular in your rotation.
Printable Recipe Card
Want just the essential recipe details without scrolling through the article? Get our printable recipe card with just the ingredients and instructions.