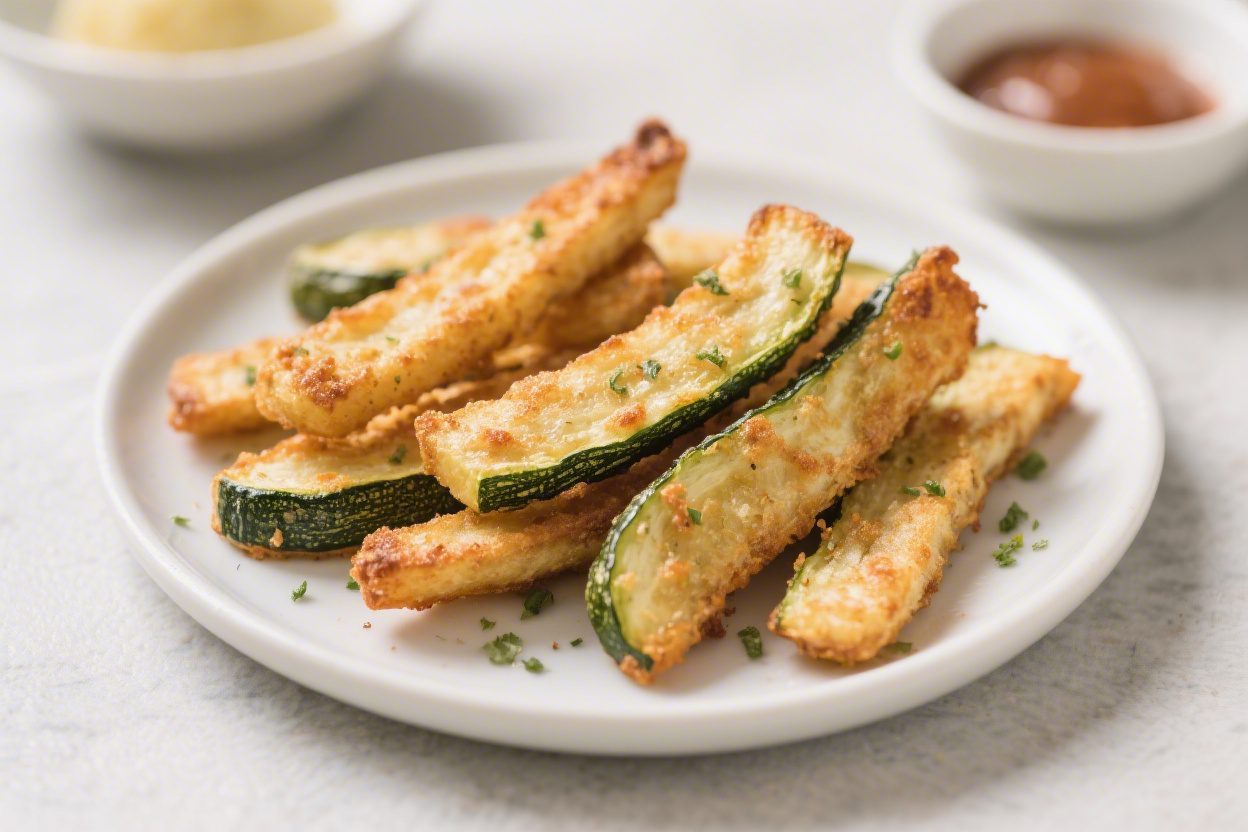
Baked Zucchini Fries – Crispy, Light, and Easy
Zucchini fries are the kind of snack that disappears fast. They’re crisp on the outside, tender inside, and pair with almost any dipping sauce you love. Best of all, they’re baked, not fried, so you get the crunch without the grease.
Whether you’re feeding kids, hosting friends, or just craving something savory, these fries hit the spot. You’ll be surprised how quickly a simple zucchini turns into a crowd-pleaser.
Ingredients
Method
- Preheat and prep. Heat your oven to 425°F (220°C). Line two baking sheets with parchment paper and lightly oil or spray them. This helps the fries crisp instead of sticking.
- Cut the zucchini. Trim the ends. Slice each zucchini into 3–4 inch sticks, about 1/2 inch thick. Aim for uniform size so they cook evenly.
- Blot excess moisture. Lay the sticks on paper towels and pat dry. Lightly salting them for 10 minutes and patting again helps reduce sogginess.
- Set up a breading station. You’ll need three shallow bowls: one with flour, one with beaten eggs, and one with a mix of panko, Parmesan, garlic powder, onion powder, paprika, salt, and pepper.
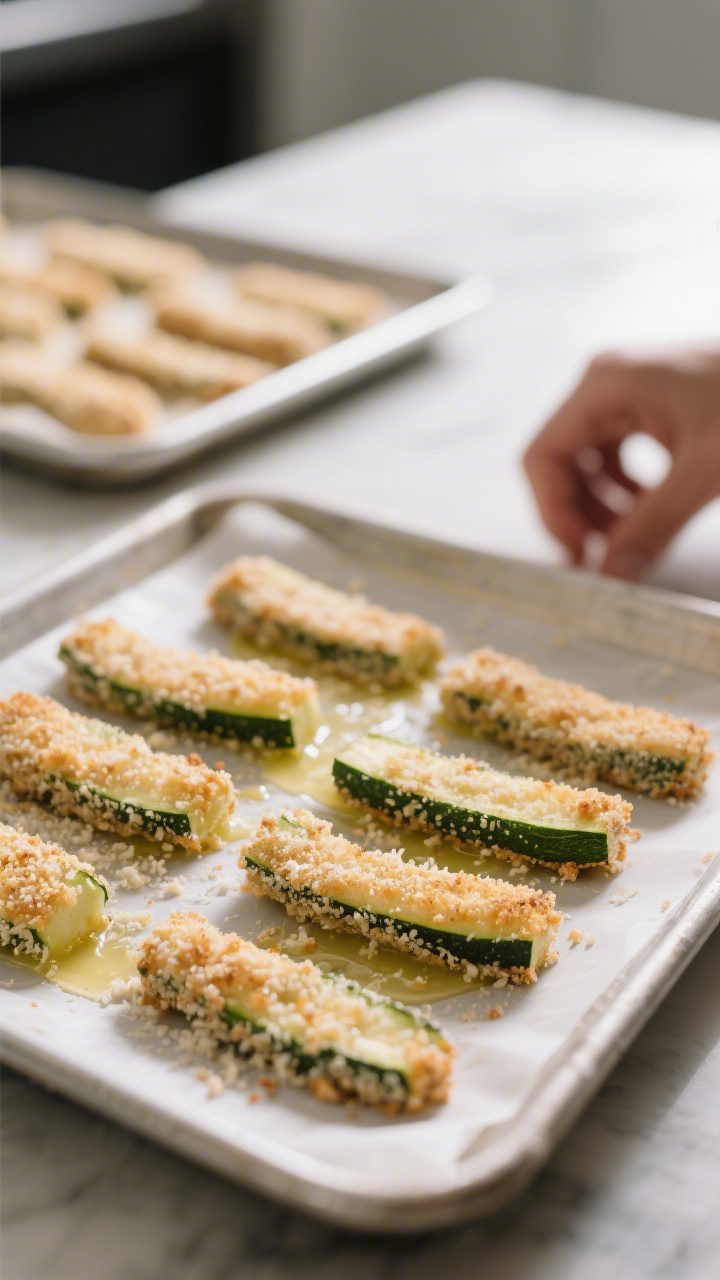
- Coat the fries. Work in batches. Dredge zucchini in flour (shake off excess), dip in egg, then press into the panko-Parmesan mix until well coated.
- Arrange on the sheets. Place coated fries in a single layer with space between them. Crowding steams them, so give them room to breathe.
- Add a little oil. Drizzle or spray with olive oil. This is key for that golden, crunchy finish.
- Bake. Bake for 12–15 minutes, then flip and bake another 8–10 minutes. They’re done when the coating is deep golden and crisp, and the zucchini is just tender.
- Optional broil. For extra crunch, broil on high for 1–2 minutes at the end. Watch closely so they don’t burn.
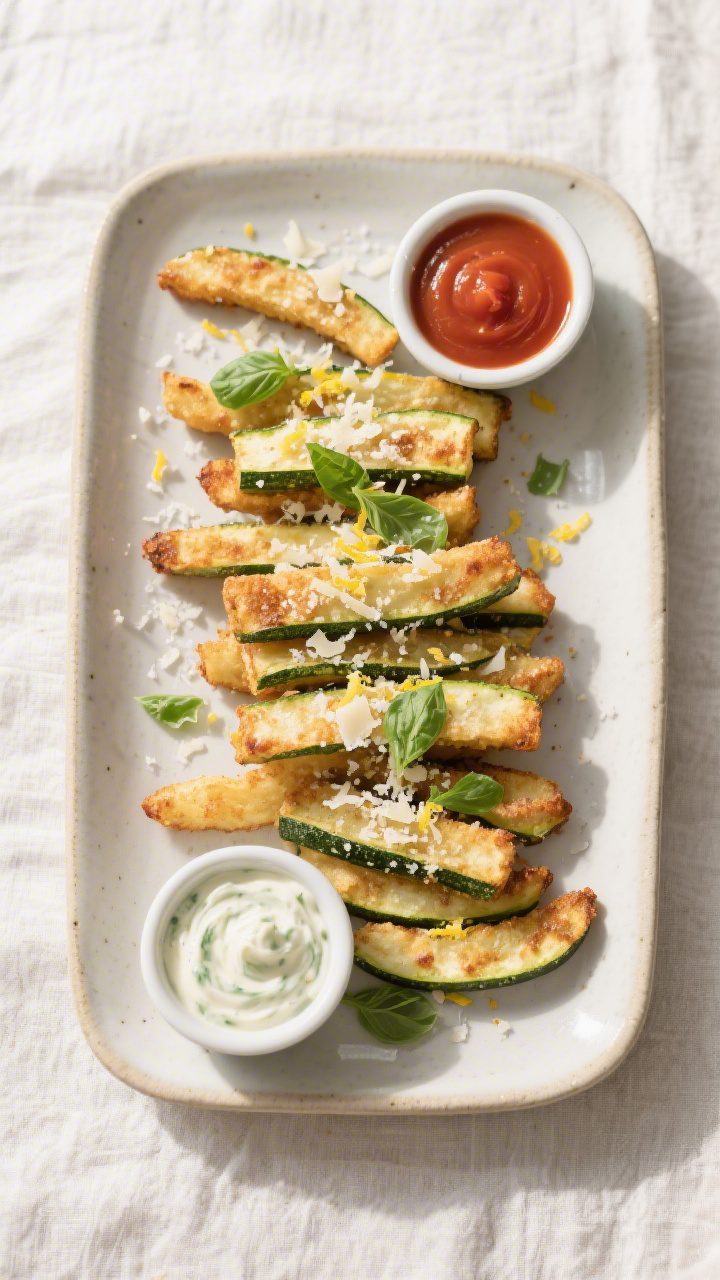
- Season and serve. Sprinkle with a pinch of salt, chopped herbs, and serve hot with your favorite dips.
What Makes This Special
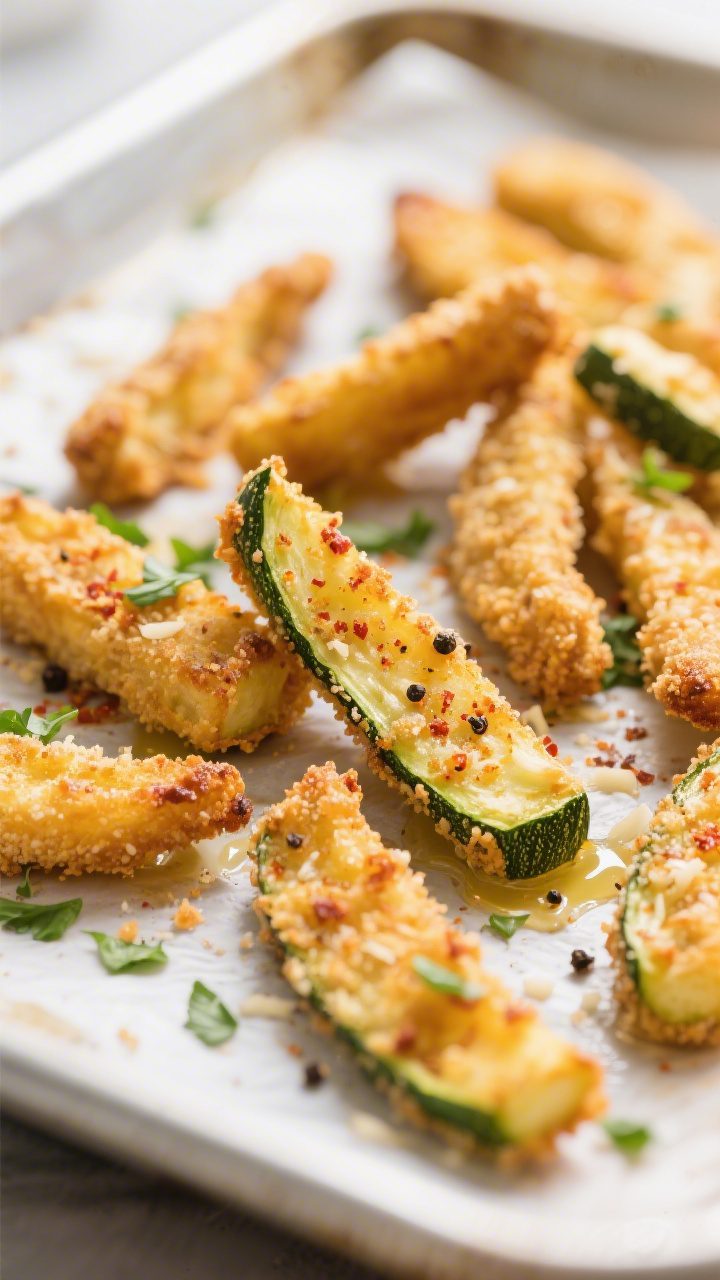
Zucchini fries are a smart swap for regular fries, but they don’t taste like a compromise. The breadcrumb coating gets beautifully golden in the oven, and a little Parmesan boosts the flavor.
There’s no deep-frying mess, and cleanup is simple. You can season them however you like—classic Italian, spicy, or even lemony. They’re a great way to use up summer zucchini, but they work year-round with store-bought squash.
Shopping List
- Zucchini: 2–3 medium (about 1.5 pounds)
- Eggs: 2 large
- All-purpose flour: 1/2 cup
- Panko breadcrumbs: 1 cup (for extra crunch)
- Grated Parmesan cheese: 1/2 cup
- Olive oil: 2 tablespoons (or spray)
- Garlic powder: 1 teaspoon
- Onion powder: 1/2 teaspoon
- Smoked paprika or regular paprika: 1/2 teaspoon
- Salt and black pepper: to taste
- Optional heat: Pinch of cayenne or red pepper flakes
- Fresh parsley or basil: for garnish (optional)
- Dips: Marinara, ranch, garlic aioli, or tzatziki
Step-by-Step Instructions
- Preheat and prep. Heat your oven to 425°F (220°C).
Line two baking sheets with parchment paper and lightly oil or spray them. This helps the fries crisp instead of sticking.
- Cut the zucchini. Trim the ends. Slice each zucchini into 3–4 inch sticks, about 1/2 inch thick.
Aim for uniform size so they cook evenly.
- Blot excess moisture. Lay the sticks on paper towels and pat dry. Lightly salting them for 10 minutes and patting again helps reduce sogginess.
- Set up a breading station. You’ll need three shallow bowls: one with flour, one with beaten eggs, and one with a mix of panko, Parmesan, garlic powder, onion powder, paprika, salt, and pepper.
- Coat the fries. Work in batches. Dredge zucchini in flour (shake off excess), dip in egg, then press into the panko-Parmesan mix until well coated.
- Arrange on the sheets. Place coated fries in a single layer with space between them.
Crowding steams them, so give them room to breathe.
- Add a little oil. Drizzle or spray with olive oil. This is key for that golden, crunchy finish.
- Bake. Bake for 12–15 minutes, then flip and bake another 8–10 minutes. They’re done when the coating is deep golden and crisp, and the zucchini is just tender.
- Optional broil. For extra crunch, broil on high for 1–2 minutes at the end.
Watch closely so they don’t burn.
- Season and serve. Sprinkle with a pinch of salt, chopped herbs, and serve hot with your favorite dips.
Storage Instructions
- Refrigerate: Cool completely, then store in an airtight container for up to 3 days.
- Reheat: Skip the microwave. Re-crisp in a 400°F (205°C) oven or air fryer for 5–8 minutes until hot and crunchy.
- Freeze: Not ideal once baked, as the zucchini can weep and soften. If you want to freeze, freeze the breaded, uncooked sticks on a tray, then bag and bake from frozen, adding a few extra minutes.
Health Benefits
- Lower in calories: Baking cuts down on oil, and zucchini itself is light, making this a smart snack or side.
- Fiber and hydration: Zucchini is high in water and provides fiber for digestion and fullness.
- Vitamins and minerals: You’ll get vitamin C, vitamin A, potassium, and antioxidants that support immune health and heart health.
- Protein and calcium boost: Parmesan adds a little protein, flavor, and calcium without heavy sauces.
Common Mistakes to Avoid
- Skipping the pat-dry step: Wet zucchini leads to soggy fries.
Take a minute to blot them well.
- Overcrowding the pan: Give them space. If they touch, they steam and stay soft.
- Under-seasoning the coating: The breadcrumb mix is your main flavor driver. Taste and adjust the seasoning before breading.
- Using only fine breadcrumbs: Panko creates the best crunch.
Regular breadcrumbs alone can bake up dense.
- Not flipping: Turning them midway helps both sides crisp.
Alternatives
- Gluten-free: Use a 1:1 gluten-free flour and gluten-free panko. Many brands make crunchy GF panko now.
- Low-carb: Swap flour for almond flour and use crushed pork rinds in place of panko. Skip or reduce the Parmesan as needed.
- Dairy-free: Omit Parmesan and add 1–2 tablespoons nutritional yeast to the breadcrumb mix for a savory kick.
- Air fryer version: Cook at 390°F (200°C) for 10–12 minutes, shaking or flipping halfway.
Work in batches so they don’t overlap.
- Spice profiles: Try lemon zest and black pepper for brightness, Cajun seasoning for heat, or Italian seasoning and extra garlic for a classic vibe.
- Coating twist: Add finely crushed cornflakes to panko for extra texture, or sesame seeds for a nutty crunch.
FAQ
How do I keep zucchini fries from getting soggy?
Pat the zucchini dry, salt lightly to draw out moisture, and bake at a high temperature with space between fries. Use panko and a bit of oil for a crisp finish, and flip halfway.
Do I need to peel the zucchini?
No. The peel helps the sticks hold their shape and adds color and nutrients.
Just wash and trim the ends.
Can I make them ahead of time?
You can bread the zucchini a few hours in advance and keep them on a tray in the fridge. Bake just before serving for the best texture.
What dips go best with zucchini fries?
Marinara, ranch, garlic aioli, tzatziki, chipotle mayo, or even a simple yogurt-lemon sauce all work well. Choose something creamy or tangy to balance the crunch.
Why are my fries burning before they’re cooked?
Your oven may run hot, or the fries might be too thin.
Reduce the temperature by 15–25°F, cut thicker sticks, and check them a few minutes early.
Can I skip the flour?
Yes, but the flour helps the egg cling better, which helps the breadcrumbs stick. If skipping, press the coating on firmly, or use a light brush of mayo instead of egg.
Is there a vegan option?
Use a plant-based milk and flour slurry (about 1/2 cup milk with 2 tablespoons flour) or aquafaba instead of egg. Omit Parmesan or use a vegan alternative.
What’s the best way to reheat leftovers?
Use an air fryer at 375°F (190°C) for 4–6 minutes or a hot oven for 5–8 minutes.
They’ll get crisp again without drying out too much.
In Conclusion
Baked Zucchini Fries prove you don’t need a fryer to get real crunch. With a simple breadcrumb-Parmesan coating and a hot oven, you get golden, flavorful fries that feel light and satisfying. Keep a couple of zucchinis on hand and you’re always a few steps away from a snack, side, or party plate that everyone enjoys.
Simple ingredients, easy method, great texture—this one belongs in your regular rotation.
Printable Recipe Card
Want just the essential recipe details without scrolling through the article? Get our printable recipe card with just the ingredients and instructions.