Strawberry Yogurt Popsicles – A Bright, Creamy Treat for Any Day
These popsicles are everything you want on a warm afternoon: cold, creamy, and bursting with strawberry flavor. They’re simple to make, budget-friendly, and far healthier than most store-bought treats. You only need a few ingredients and a blender, and the results look as good as they taste.
Kids love them, adults love them, and they’re easy to customize for different tastes or dietary needs.
Ingredients
Method
- Prep the strawberries. Rinse, hull, and chop the berries. If using frozen strawberries, thaw slightly so your blender can handle them.
- Blend the base. Add strawberries, yogurt, honey or maple syrup, lemon juice, vanilla, and a pinch of salt to a blender. Blend until smooth and creamy. Taste and adjust sweetness; remember flavors dull a bit once frozen.
- Decide on texture. For a smooth pop, use the mixture as-is. For chunks, stir in finely chopped strawberries. For a ripple, swirl in strawberry jam gently with a spoon.
- Fill the molds. Pour the mixture into popsicle molds, leaving a little space at the top for expansion. If you don’t have molds, use small paper cups or a muffin tin lined with paper liners.
- Add sticks. If your molds don’t hold sticks on their own, freeze for 45–60 minutes until slushy, then insert sticks so they stand upright.
- Freeze solid. Freeze 4–6 hours, or until completely firm. Overnight is simplest.
- Unmold with care. Run warm water over the outside of the mold for 10–20 seconds. Gently wiggle the sticks to release the pops.
- Serve and enjoy. Eat right away or wrap individually for later. Expect bright strawberry flavor with a cool, creamy finish.
What Makes This Special
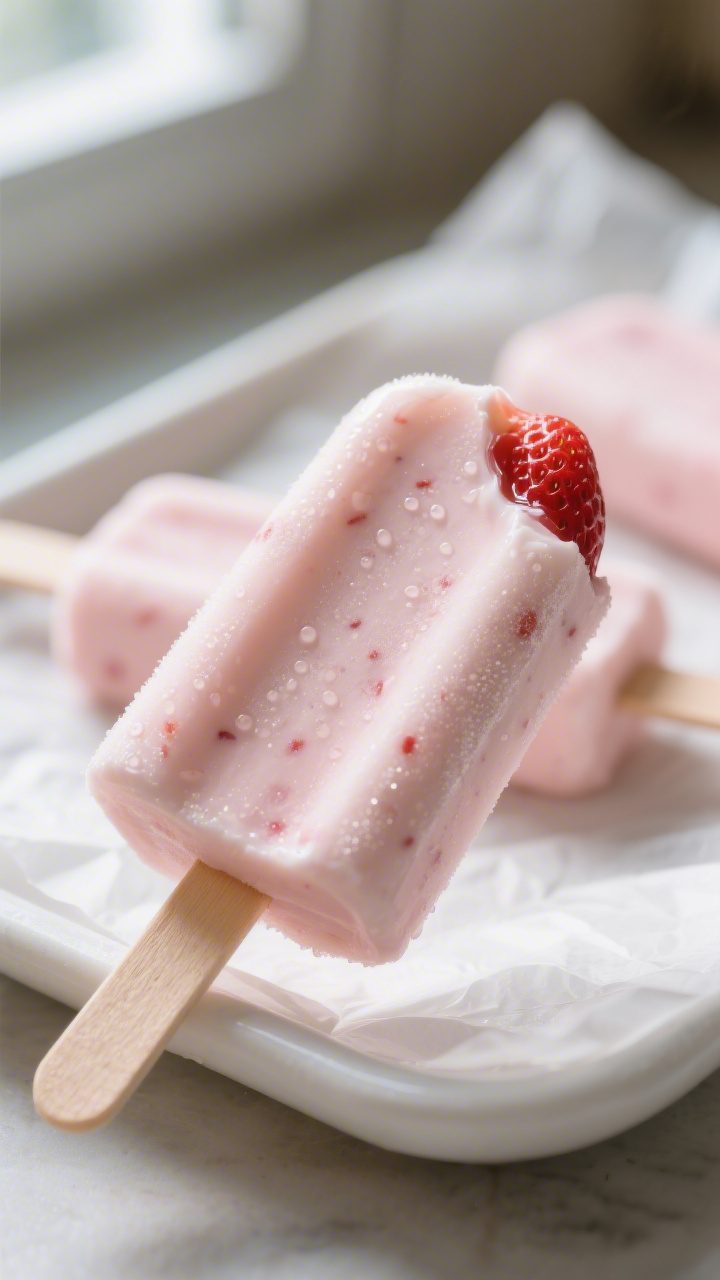
These Strawberry Yogurt Popsicles strike the right balance between sweet and tangy. Fresh strawberries add a juicy brightness, while yogurt brings a smooth, satisfying creaminess. Because you control the ingredients, you can keep the sugar low and the flavor clean.
They also set up beautifully, with a pretty pink color that comes naturally from the berries. Best of all, they’re ready for the freezer in minutes.
Ingredients
- 2 cups fresh strawberries, hulled and roughly chopped (frozen works too)
- 1½ cups plain Greek yogurt (or regular yogurt for a lighter texture)
- 3–4 tablespoons honey or maple syrup, to taste
- 1 teaspoon fresh lemon juice (optional, brightens the flavor)
- 1 teaspoon vanilla extract (optional, adds warmth)
- Pinch of salt (balances sweetness)
- Optional swirls or add-ins:
- 1–2 tablespoons chia seeds (for texture and fiber)
- ¼ cup finely chopped strawberries (for chunks)
- 2 tablespoons strawberry jam (for a ripple effect)
Instructions

- Prep the strawberries. Rinse, hull, and chop the berries. If using frozen strawberries, thaw slightly so your blender can handle them.
- Blend the base. Add strawberries, yogurt, honey or maple syrup, lemon juice, vanilla, and a pinch of salt to a blender.
Blend until smooth and creamy. Taste and adjust sweetness; remember flavors dull a bit once frozen.
- Decide on texture. For a smooth pop, use the mixture as-is. For chunks, stir in finely chopped strawberries.
For a ripple, swirl in strawberry jam gently with a spoon.
- Fill the molds. Pour the mixture into popsicle molds, leaving a little space at the top for expansion. If you don’t have molds, use small paper cups or a muffin tin lined with paper liners.
- Add sticks. If your molds don’t hold sticks on their own, freeze for 45–60 minutes until slushy, then insert sticks so they stand upright.
- Freeze solid. Freeze 4–6 hours, or until completely firm. Overnight is simplest.
- Unmold with care. Run warm water over the outside of the mold for 10–20 seconds.
Gently wiggle the sticks to release the pops.
- Serve and enjoy. Eat right away or wrap individually for later. Expect bright strawberry flavor with a cool, creamy finish.
Storage Instructions
- In the mold: Keep in the freezer for up to 1 month. After that, texture and flavor may fade.
- Individually wrapped: Remove from molds, then wrap each pop in parchment or plastic wrap.
Store in an airtight freezer bag for up to 6 weeks.
- Prevent freezer burn: Minimize air exposure and keep pops toward the back of the freezer where the temperature is most stable.

Why This is Good for You
- Real fruit, real benefits: Strawberries bring vitamin C, antioxidants, and natural sweetness without heavy added sugar.
- Protein and probiotics: Greek yogurt adds protein that helps you feel satisfied, and live cultures can support gut health.
- Lower in sugar than store-bought: You control the sweetener and can keep it light while still tasting dessert-worthy.
- Smart snack or breakfast: These pops double as a quick morning bite on hot days, especially with chia seeds for fiber.
Pitfalls to Watch Out For
- Too tart or too bland: Strawberries vary. Taste your blend before freezing and adjust sweetener or lemon juice.
- Ice crystals: A higher water content can make pops icy. Greek yogurt helps keep them creamy.
Blending thoroughly also helps.
- Sticks falling out: Insert sticks when the mixture is slushy, or use molds that secure the sticks from the start.
- Hard to unmold: Don’t yank. A quick rinse under warm water loosens the edges and protects the texture.
- Over-sweetening: Freezing mutes sweetness slightly, but it’s easy to overshoot. Add sweetener in small amounts and retaste.
Alternatives
- Dairy-free: Use a thick coconut yogurt or oat-based yogurt.
Add an extra tablespoon of sweetener if needed to balance tang.
- Different fruits: Swap in raspberries, peaches, or mango. For seeds (like raspberries), strain if you prefer a smoother pop.
- Layered pops: Alternate strawberry mixture with plain vanilla yogurt for pretty stripes. Freeze each thin layer for 20–30 minutes before adding the next.
- High-protein version: Use Greek yogurt and add 1–2 tablespoons of unflavored or vanilla whey or plant protein.
Blend well to avoid graininess.
- No added sugar: Use very ripe strawberries and skip sweetener, or add a mashed ripe banana for natural sweetness.
- Lime-basil twist: Add 1 teaspoon lime zest and 2–3 finely chopped basil leaves to the blend for a refreshing, grown-up flavor.
FAQ
Can I use frozen strawberries?
Yes. Thaw them slightly so they blend smoothly. You may need a touch more sweetener because frozen berries can taste a bit less sweet.
Do I have to use Greek yogurt?
No.
Regular yogurt works and makes a lighter, icier pop. Greek yogurt creates a thicker, creamier texture with more protein.
How do I make them sweeter without refined sugar?
Use honey, maple syrup, or a soft Medjool date blended into the mixture. A ripe banana also adds natural sweetness and body.
What if I don’t own popsicle molds?
Use small paper cups, silicone muffin cups, or an ice cube tray.
Cover with foil and poke sticks through the foil to hold them upright.
Why do my popsicles taste less sweet after freezing?
Cold temperatures dull sweetness. Make the mixture slightly sweeter than you’d want at room temperature so it tastes just right when frozen.
How long do they need to freeze?
Plan on 4–6 hours. For the cleanest unmolding and best texture, freeze overnight.
Can I add chocolate?
Absolutely.
Fold in mini chocolate chips or dip unmolded pops in melted dark chocolate and refreeze briefly on a parchment-lined tray.
Are these suitable for toddlers?
Yes, but cut back on sweetener and avoid honey for children under one year old. Consider making smaller, easier-to-hold pops.
How can I prevent icy bits?
Use Greek yogurt, blend until completely smooth, and avoid adding water or ice. A tablespoon of corn syrup or a splash of glycerin can also reduce iciness, though it’s optional.
Can I make a swirl effect?
Yes.
Spoon a little strawberry jam or a thicker strawberry puree into the molds and gently swirl with a skewer before freezing.
Wrapping Up
Strawberry Yogurt Popsicles are a simple pleasure that never gets old. With just a blender and a few ingredients, you can make a wholesome treat that tastes like summer in every bite. Keep a batch in the freezer for after-school snacks, backyard get-togethers, or an easy dessert.
Once you’ve tried the base recipe, play with layers, add-ins, and flavors to make it your own.
Printable Recipe Card
Want just the essential recipe details without scrolling through the article? Get our printable recipe card with just the ingredients and instructions.